Installation
One thing of note is that while the Hyper 212 Evo is listed as having AM4 support, the fine print stated you will need to contact Cooler Master to get the AM4 mounting kit, which consists of a different X-Brace and 4 mounting posts. While the AM4 mounting kit is “free,” we were charged $14 shipping for it, which is significant compared to the cost of the cooler itself.
The Hyper 212 Evo uses the stock AM4 backplate, but not the stock cooler mounts. First the stock cooler mounts are removed from the backplate by removing the four phillips head screws, then the mounting posts included with the AM4 installation kit are screwed into the backplate. This will be significantly easier if the backplate is adhered to your AM4 motherboard, otherwise an extra hand is useful, or as we do, lie the case down and with 1 hand support the backplate on the back of the motherboard, while attaching the mounting posts with the other.
Another thing of note, if your backplate is not adhered to the motherboard, the backplate will remain loose after the mounting posts have been fully tightened, we would love to see the inclusion of different mounting posts, or even some washers to prevent this.
Next Step
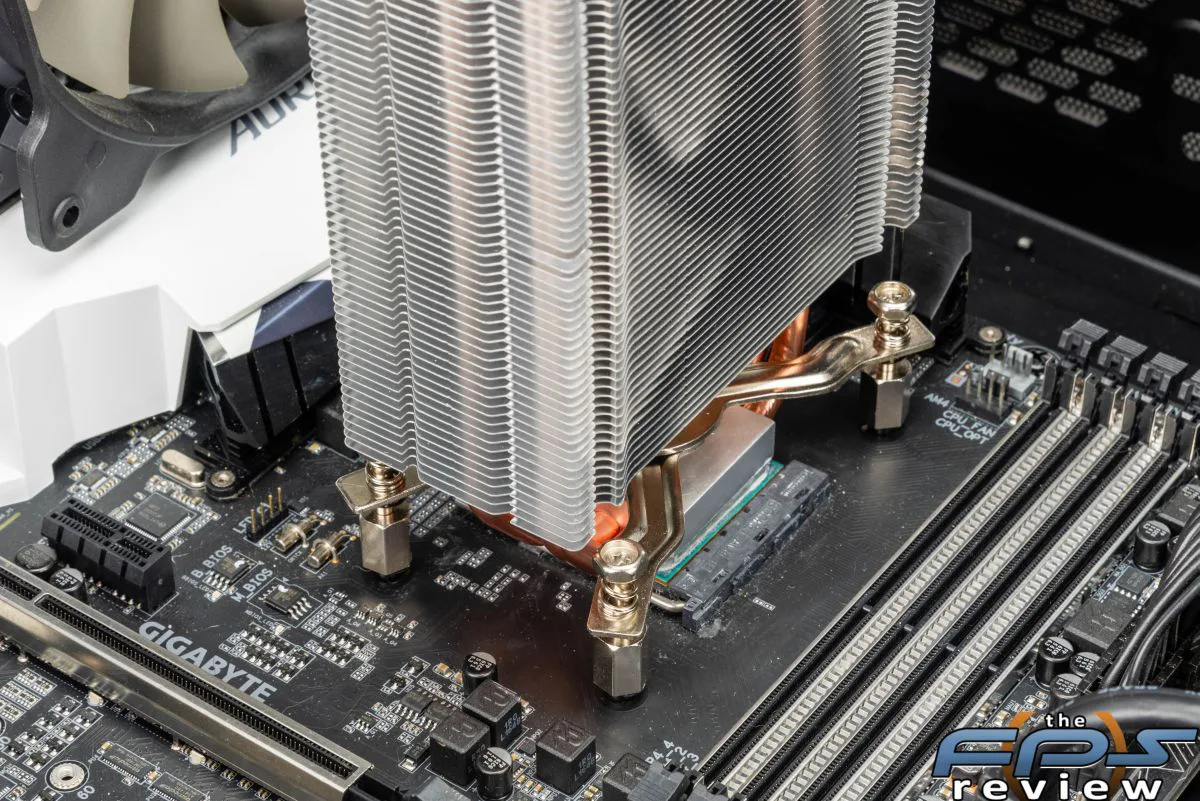
Next is positioning the X-Brace onto the base of the cooler. Unfortunately the printed instructions included with the AM4 mounting kit are a little lacking here, and getting the brace into the correct position is more trial and error of placing the X-Brace on the baseplate of the cooler, and holding it up to the CPU to see if the mounting holes are aligned. Fortunately, the instructions provided on Cooler Masters website are much better.
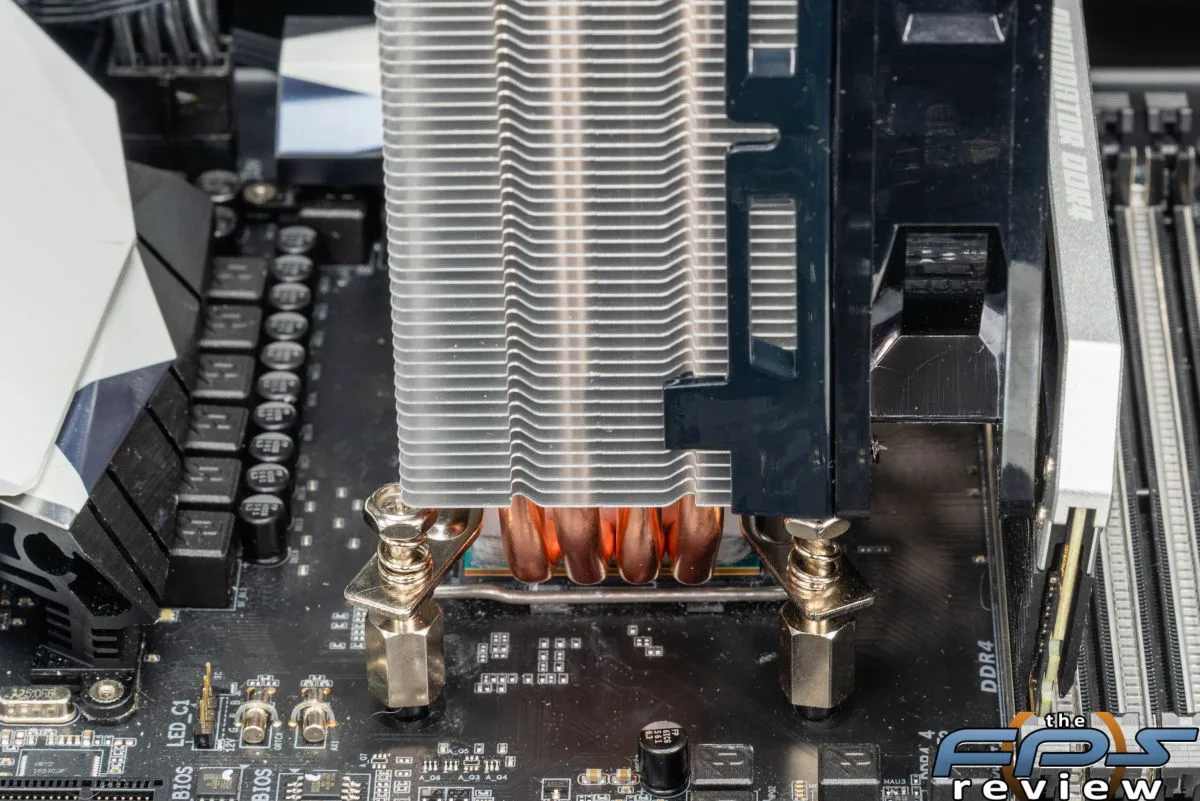
There is a post on the bottom of the X Brace that fits into a dimple in the top of the baseplate, as well as a pin on the top of the baseplate that is designed to keep the X-Brace aligned. Opening the X-Brace completely, slipping it in between the heatpipes, and then collapsing it into position was the method easiest for us.
Thermal Paste
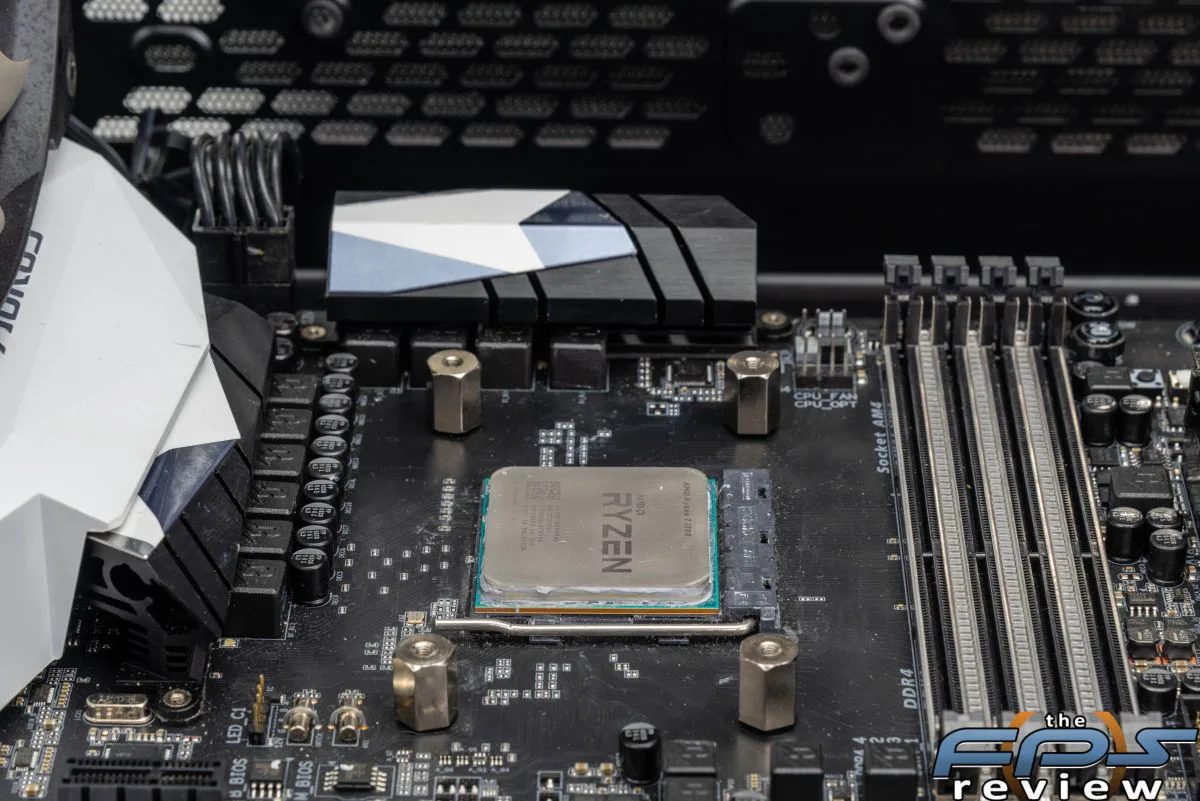
After that apply thermal paste to the CPU, place the baseplate onto the CPU and evenly tighten the four phllips head screws that are held captive on the X-Brace. Once again, if your backplate is not adhered to the motherboard, the slack can make it difficult to get the screw started into the mounting posts. Either you will need to reach around the motherboard and support the backplate, or use a good deal of force to compress the springs on the captive screws in order to get them started.
Once the screws are started simply tighten them in an alternating pattern until they bottom out. Even fully tightened the cooler was able to twist quite easily on the CPU, how this may affect performance is yet to be seen.
Final Step
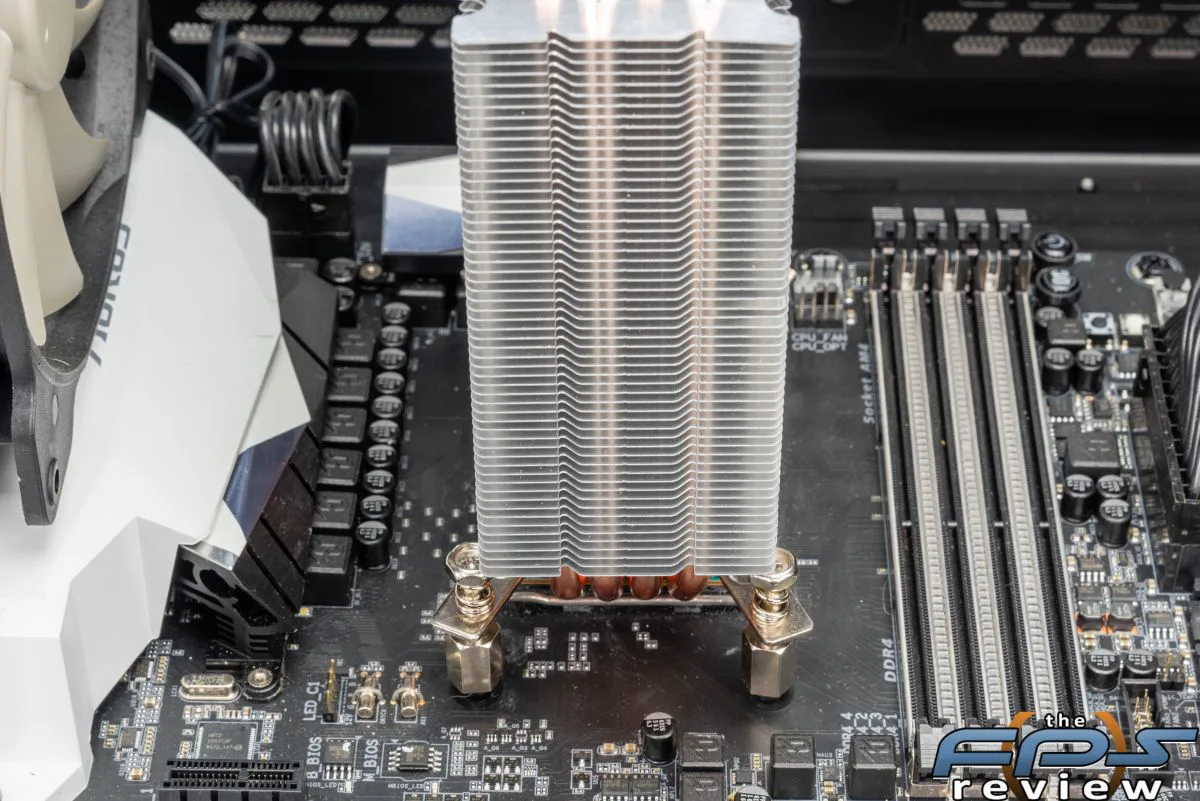
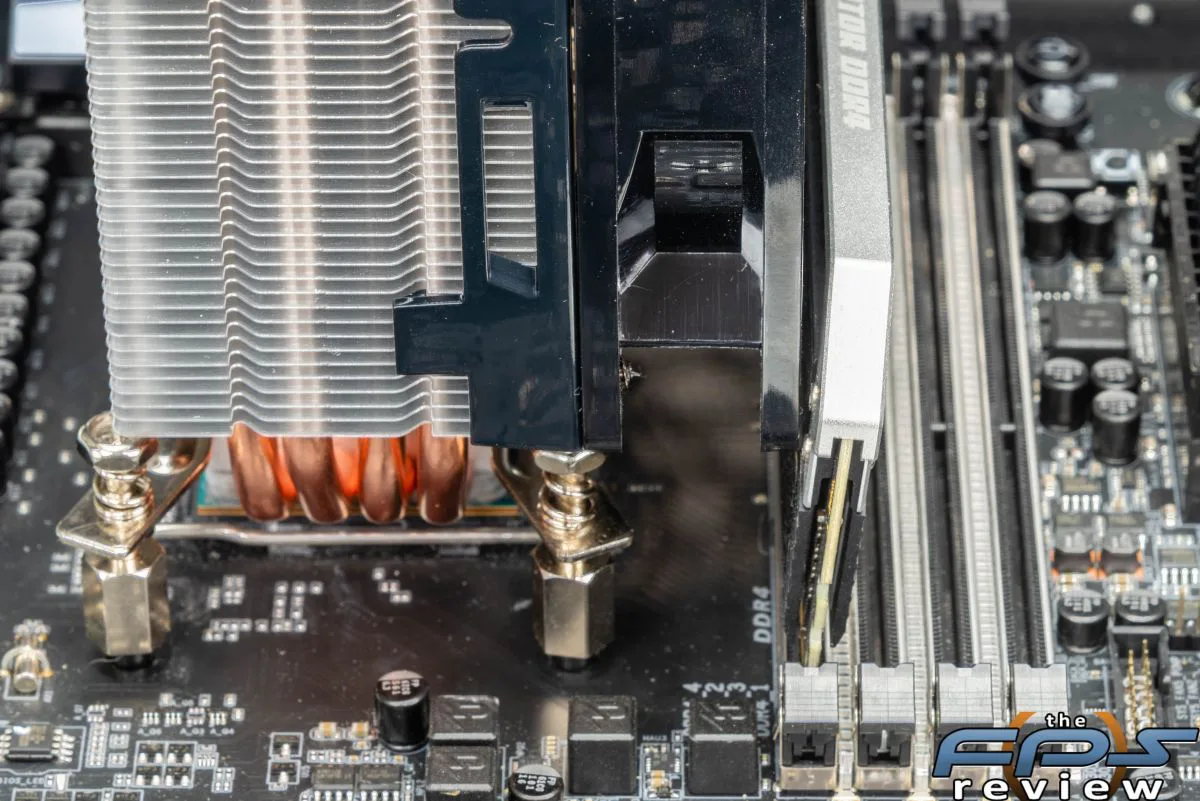
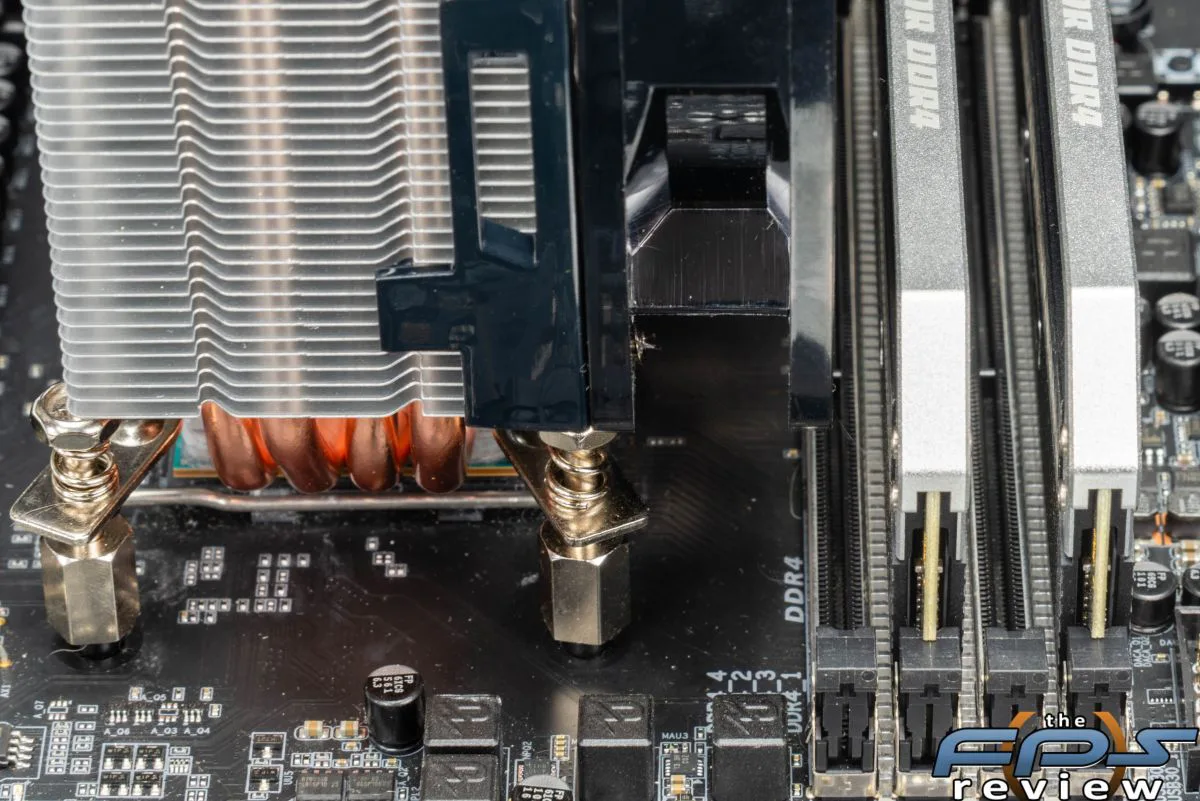
The final step comes with mounting the fan to the cooler by simply snapping it into place using the “Quick-Snap” brackets, and connecting the 4-pin PWM wire to the motherboards CPU fan header. Ram compatibility may be an issue with the Hyper 212 Evo. After the fan is in place, it ever so slightly hangs over the DIMM slot nearest to the CPU socket.
This overhang, coupled with the height of the cooler did prevent us from installing our tall, Corsair Dominator Platinum memory into that slot, however the other 3 slots are unaffected, and there is enough room to get a lower profile RAM stick like our Corsair LPX into the slot nearest the CPU socket, then install the fan afterwards.
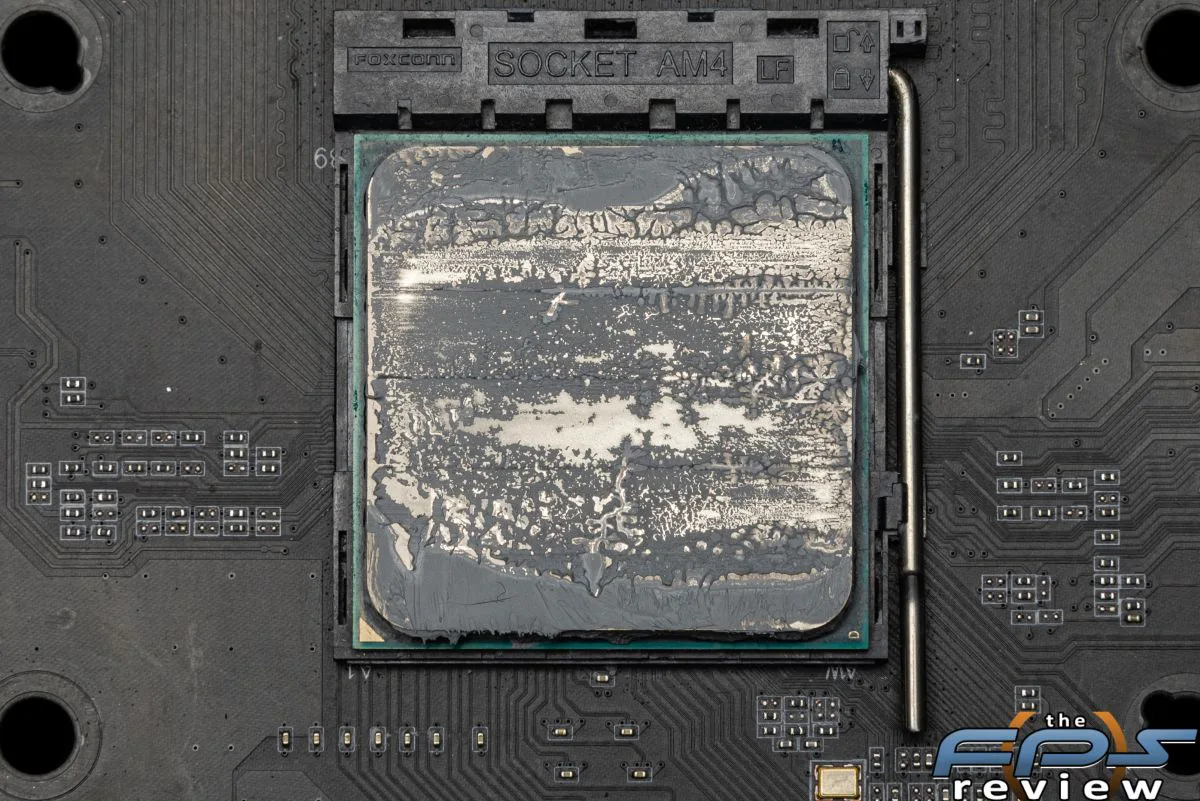
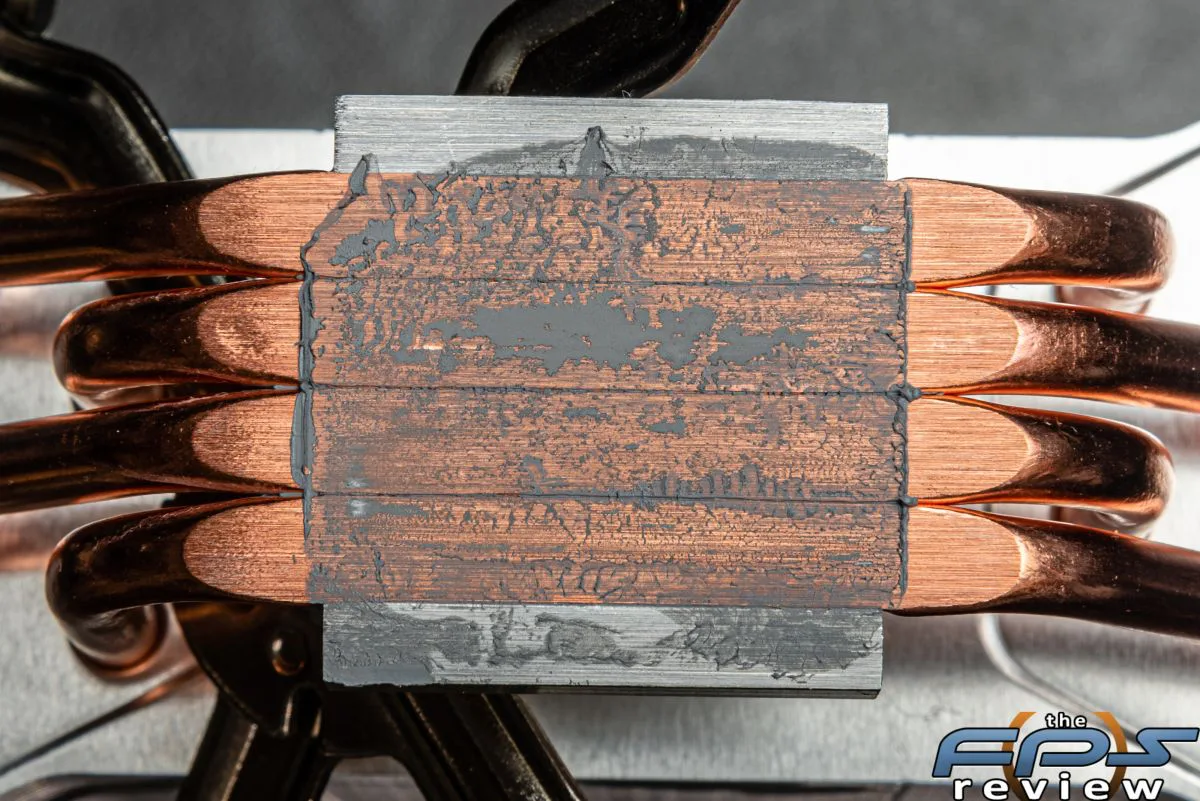
Mate
As you can see despite the relatively low mounting pressure we observed, the mate between the Hyper 212 Evo’s direct heatpipes and our processor was fantastic.