BIOS
Before starting this review, we deemed it proper to update the BIOS to the latest version prior to lab testing this motherboard. We updated to the f11i version with the build and release date of 2020/11/20.
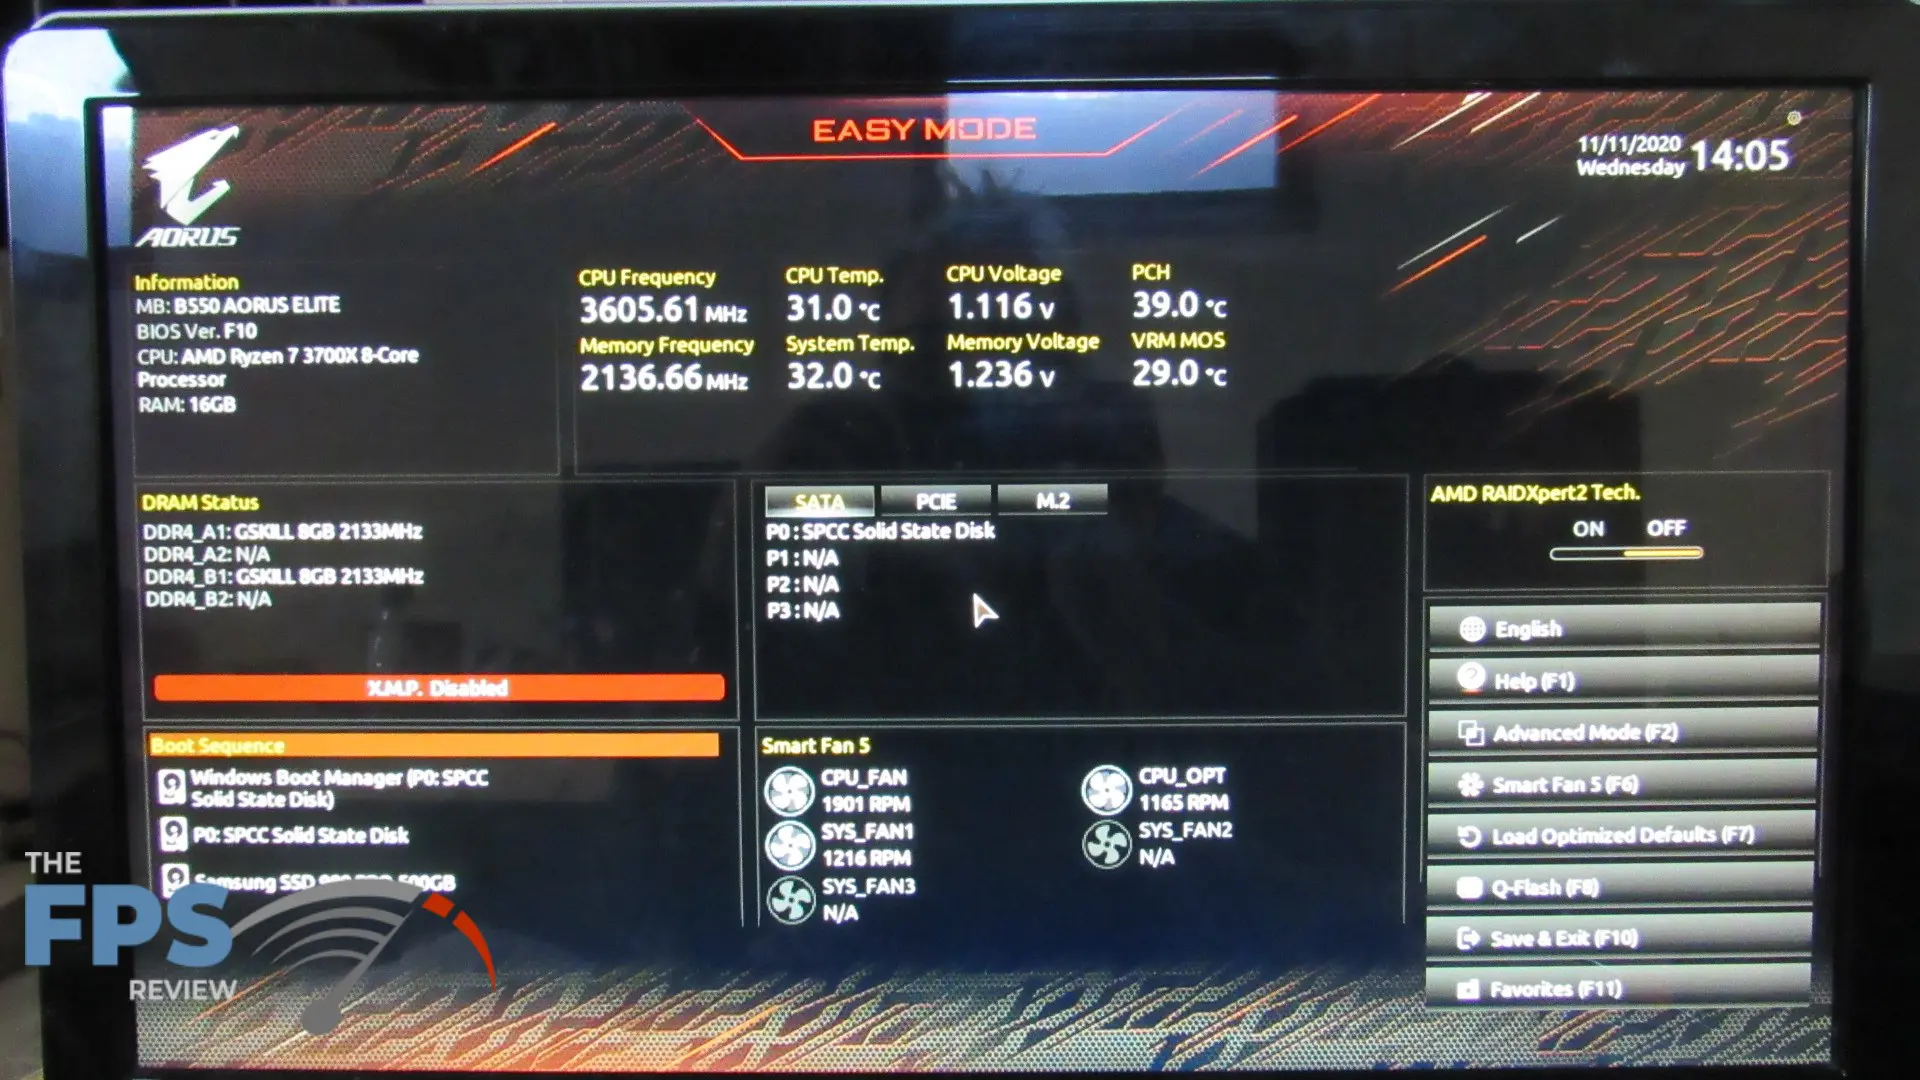
Like most motherboards, you can enter the BIOS during bootup by hitting the Delete key on your keyboard. Once you enter the BIOS you are greeted with “Easy Mode.” The GIGABYTE AORUS ELITE includes two different modes. It has Easy Mode and Advanced Mode and one can switch between the two modes by either your mouse or hitting the F2 key on the keyboard.
As one can imagine, in Easy Mode there really isn’t much a person can perform in the way of changing settings, overclocking CPU, or overclocking memory. This mode gives mainly system information for the user to view. You can see your system hardware information, CPU temp, motherboard temp, CPU frequency, memory frequency, fan speeds, and a few other interesting statistics.
Now as we proceed to the Advanced Mode, there is a ton of things we can see and do. This is where an advanced user can make changes to allow for overclocking both the CPU and memory. As a warning, if a person isn’t careful you will render your system unusable until you clear the CMOS. This could cause issues in your operating system as well. Heed the warning!
When switching to the Advanced mode we are greeted with the Tweaker window. This is where a person can change CPU and memory frequencies. This is the main area for overclocking for awesome gains in performance and cooling.
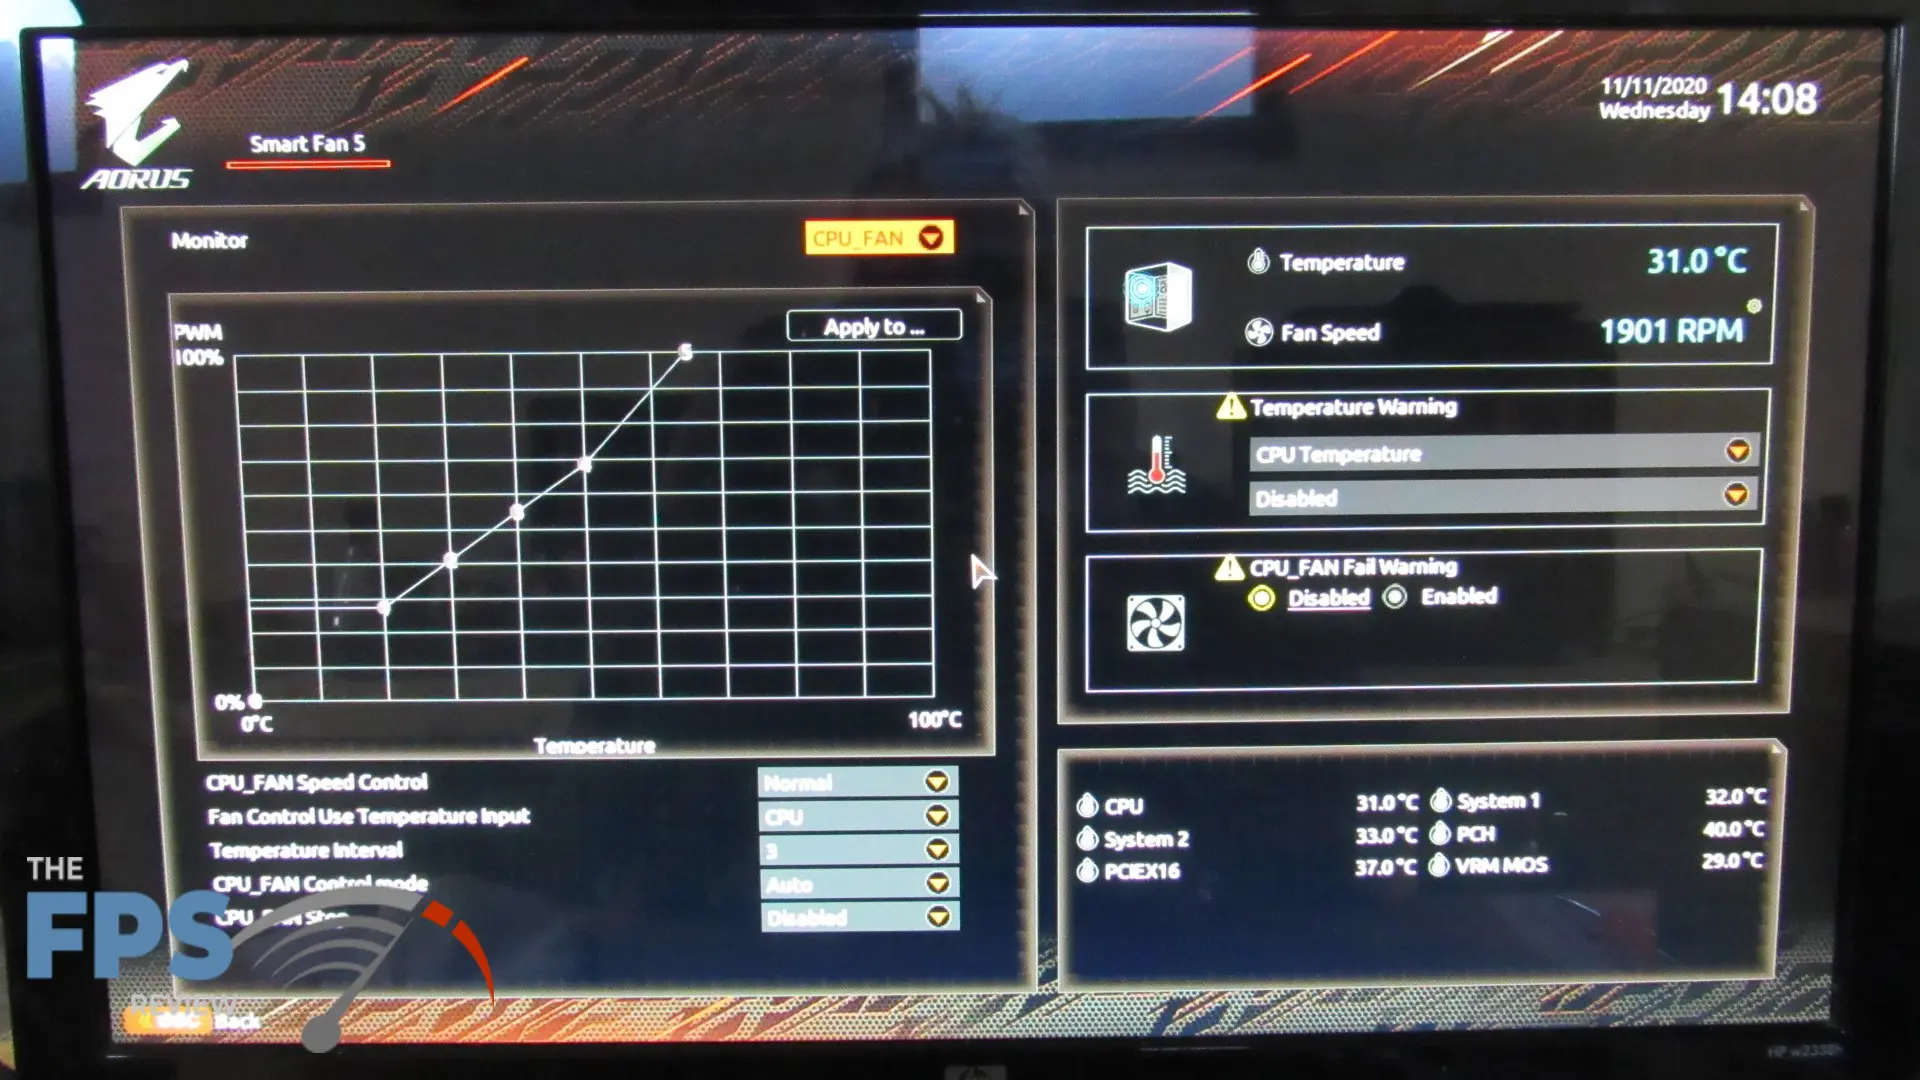
Next, we can see the Settings window. In this window, we can manage platform power, IO ports, miscellaneous, AMD CBS, and AMD Overclocking. We can also see information on PC health and adjust fans through the Smart Fan 5 application. In the Smart Fan 5 app, we can adjust the CPU fan, CPU-OPT, SYS-FAN1, SYS-FAN2, and SYS-FAN3. These can be adjusted by simple fan speeds or through the built-in temp app on the righthand side of the window. You can also turn on or off temp warnings as well as fan fail warnings.
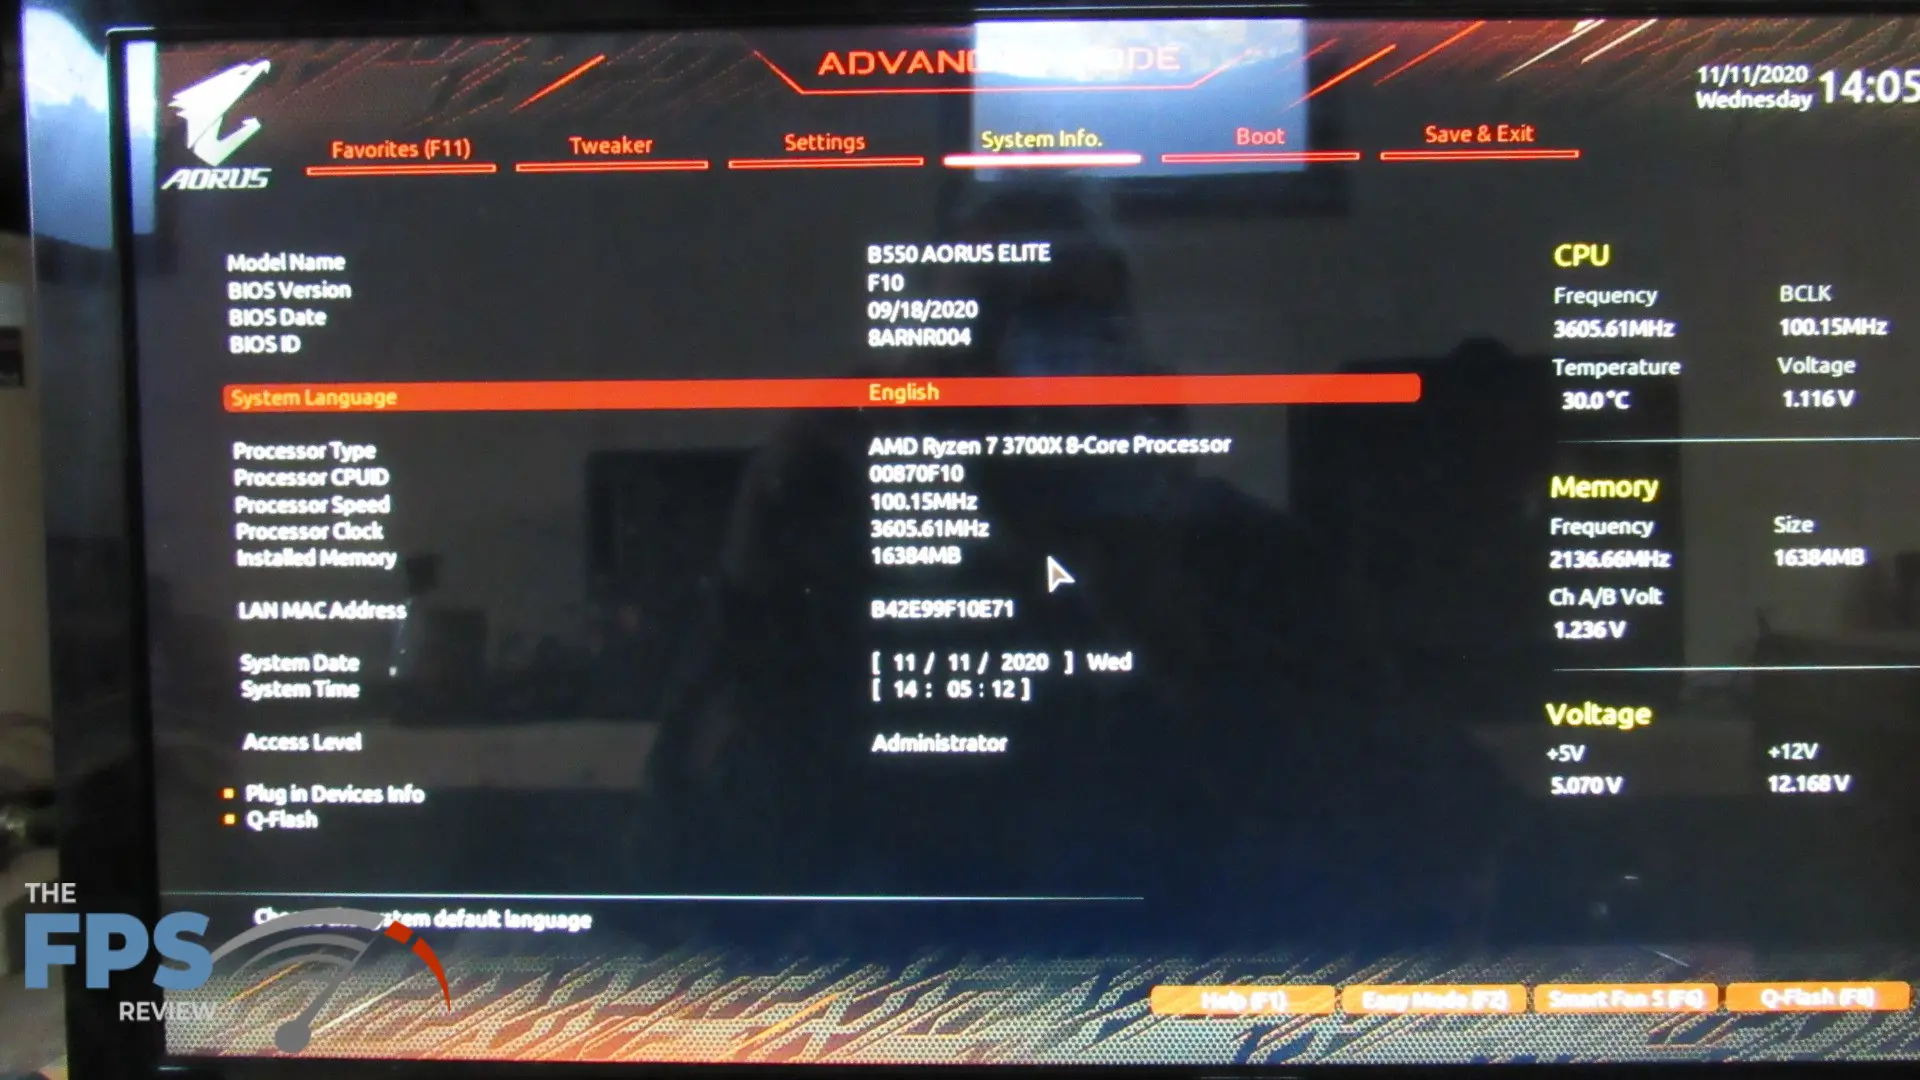
Going back to the main window screen we can now move over to the System Info window. In this area of the BIOS, it gives us a lot of system information that includes the BIOS revision, CPU type, and ID, CPU speed and clock, and we can adjust system date and time. It also has a separate window that can be opened to display plug-in device information as well. Next, we can open up the Q-Flash utility which enables us to flash the bios from a file on a USB stick, external drive, or a main hard drive.
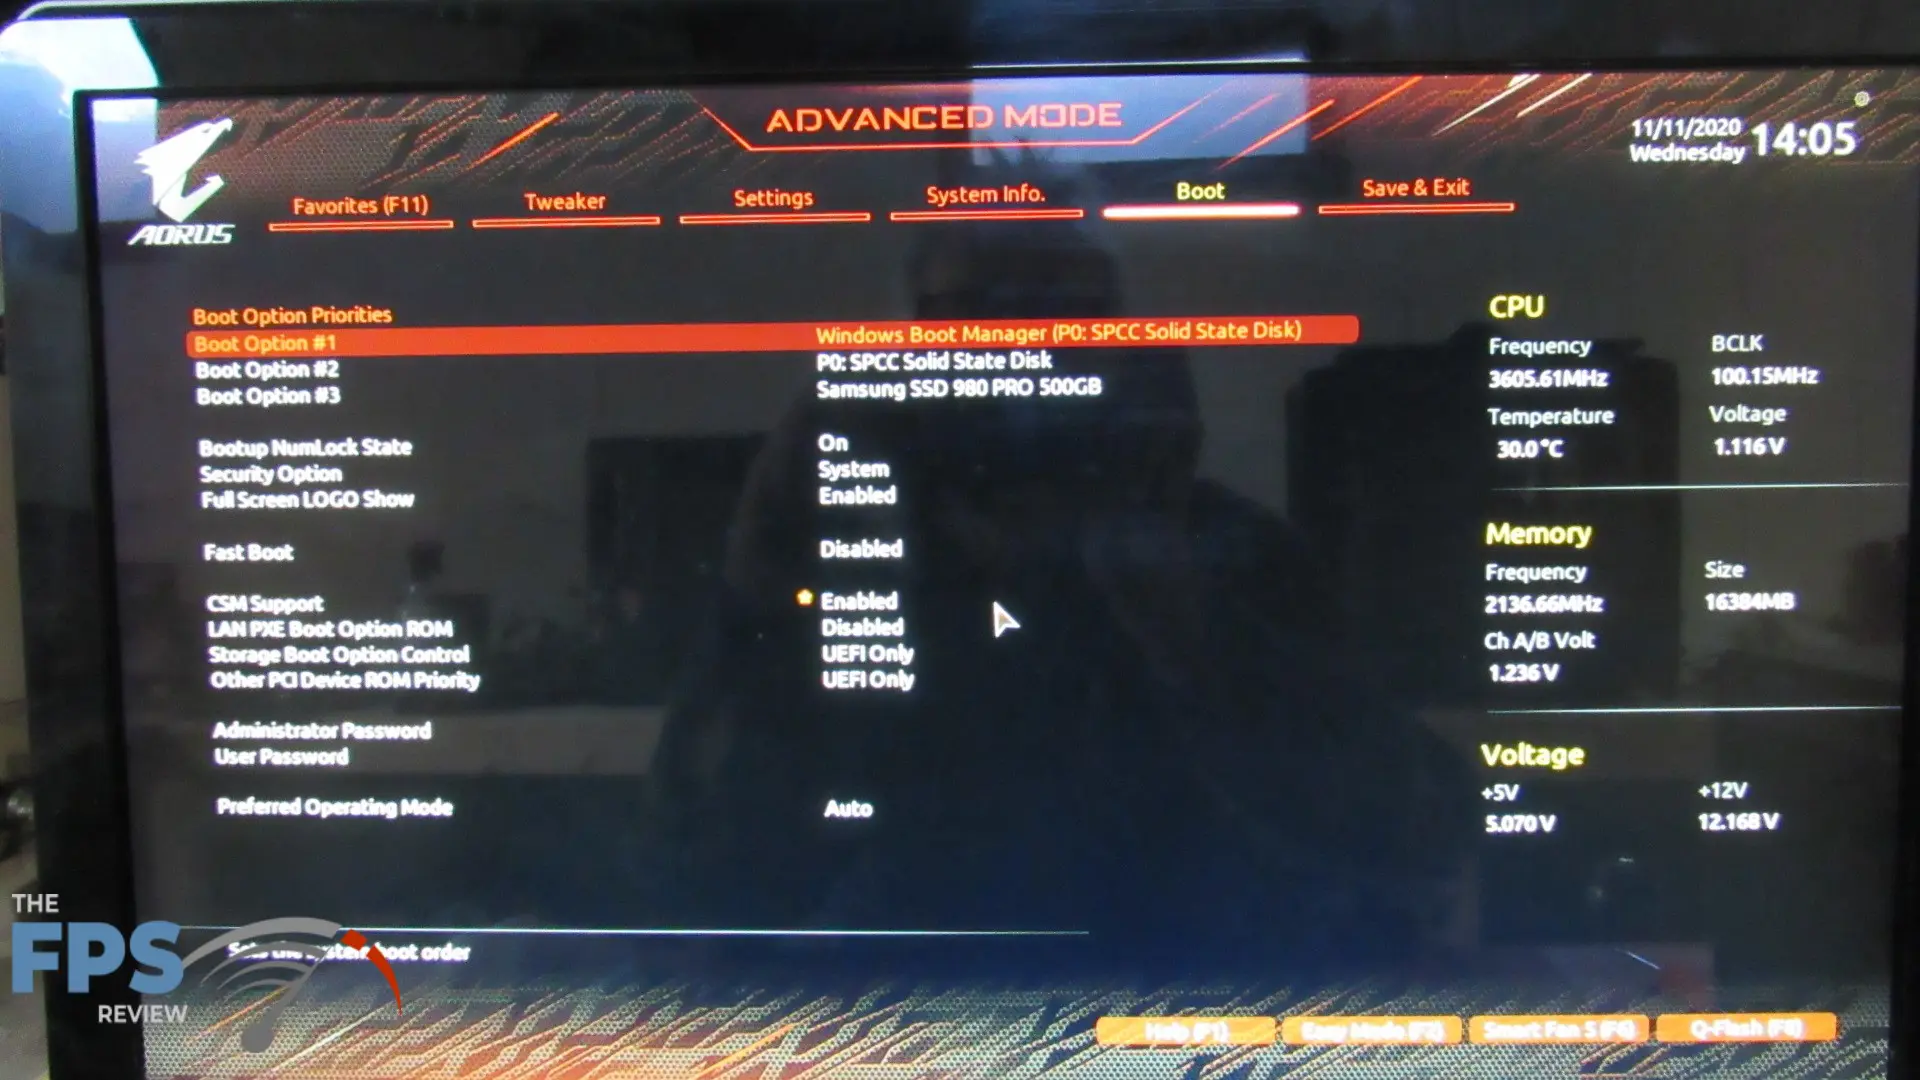
Moving on we next get to the Boot menu window. In this window, a person is able to change his or her boot priority and set up which drive one wishes to boot from. As with almost all newer motherboards, one can boot from a USB flash drive for the ability to install your preferred operating system. Within this window, a person can also enable or disable NUM locks and Full-Screen LOGO. You can also set up an administrator password for the BIOS if desired.
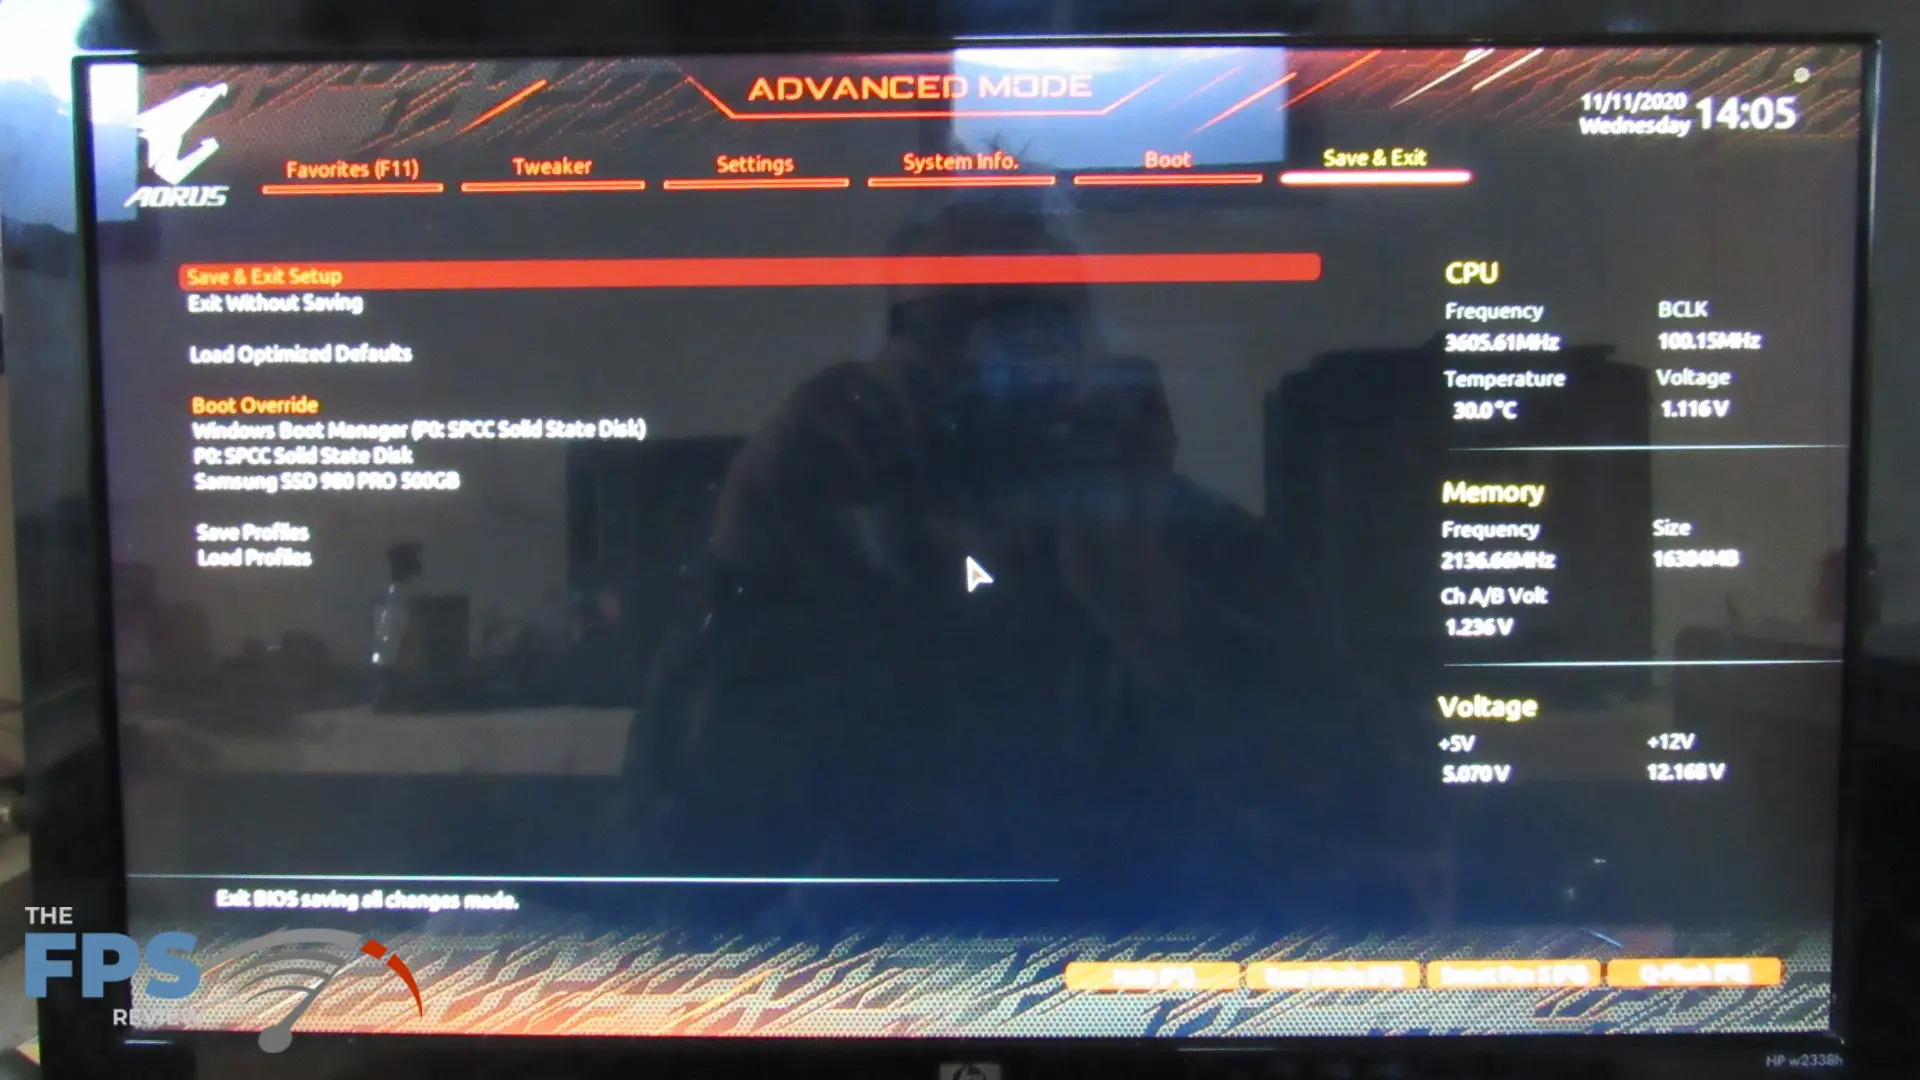
Next, we get to the final main window; Save & Exit. This is pretty much like all other UEFI BIOS windows. Moving down this window you have Boot Override Options, Save Profiles, and Load Profiles.
Within all of the main windows, we can always see CPU info, Memory info, and Voltage info on the far righthand side of said windows.