BIOS
Prior to doing all the testing on this motherboard, we checked and the board we received had the latest BIOS version. However, once we finished the review, we found that MSI has an updated BIOS available for this specific motherboard. So, for end-users that are looking at purchasing this board, MSI has released a later BIOS version.
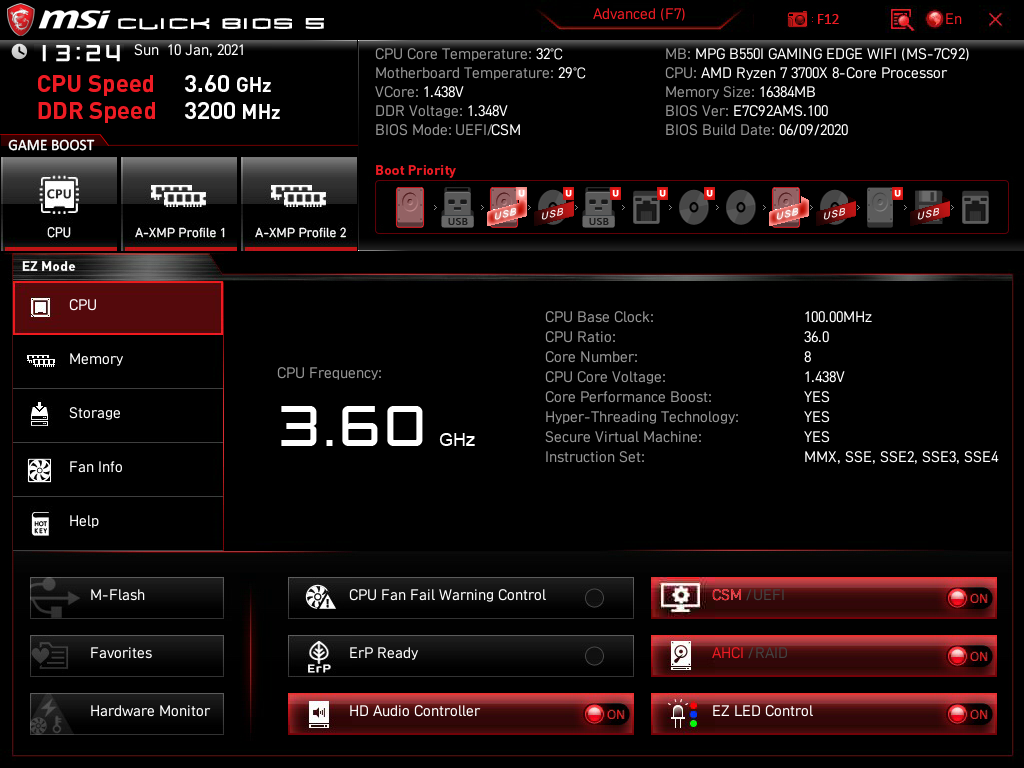
Like most motherboards, you can enter the BIOS during bootup by hitting the Delete key on your keyboard. Once you enter the BIOS you are greeted with “Easy Mode.” Like almost all newer motherboards, F7 will put the BIOS in Advanced mode. The advanced mode can be done by hitting the F7 or using one’s mouse.
Easy Mode, as one would expect, really doesn’t allow for many changes in the system. EZ mode is more of an informational area than being able to tweak the system. There are a few things to note in this mode though. You can enter your hardware monitor, M-Flash, Audio Controller, and a few other things of interest.
One doesn’t really get into the meat of the system until you enter the advanced mode of the BIOS. Here is where a person is able to really start delving into overclocking, fan controls, and the advanced motherboard settings. This is also where you are able to set up memory timings such as A-XMP profiles.

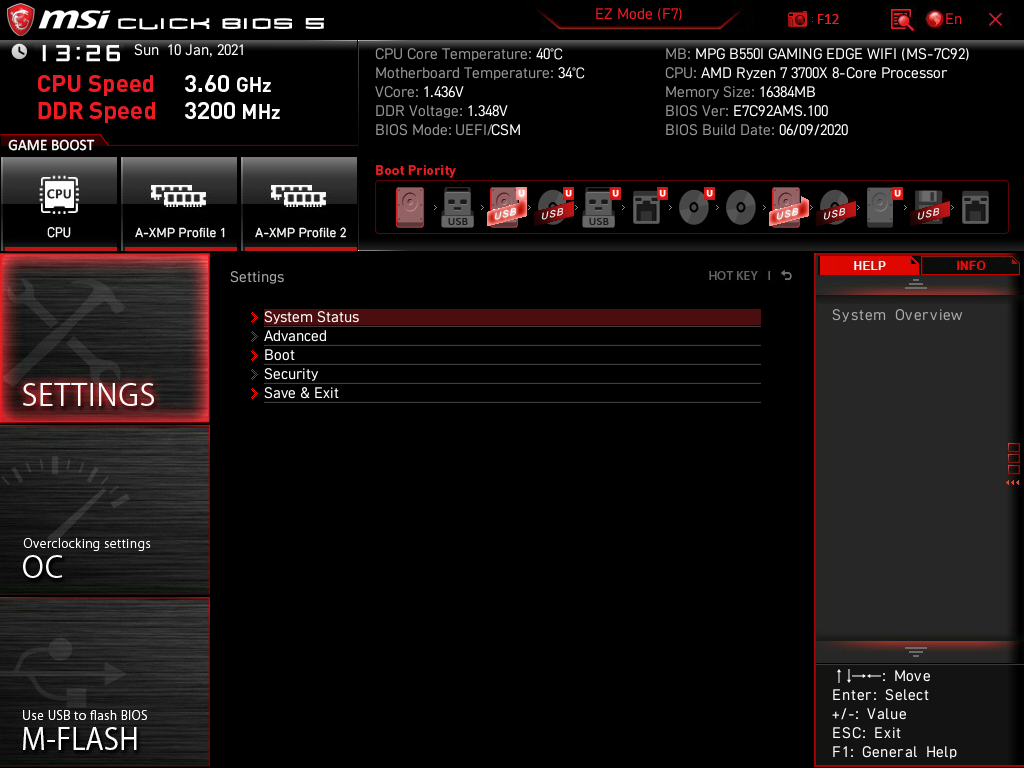
When we click on the “SETTING” tab we are greeted with a few system settings: System Status, Advanced, Boot, Security, and Save & Exit. The “System Status” mainly gives us information regarding the drives installed and the main system information. At the bottom, there is a DMI Information tab to look at these items.
Once we click on the “Advanced” area we find a lot of other areas that include “AMD Overclocking” at the bottom. Some of the more mentionable settings in this area are “Integrated Peripherals”, “Power Management Setup”, “Windows OS Configuration”, and “Secure Erase+”.

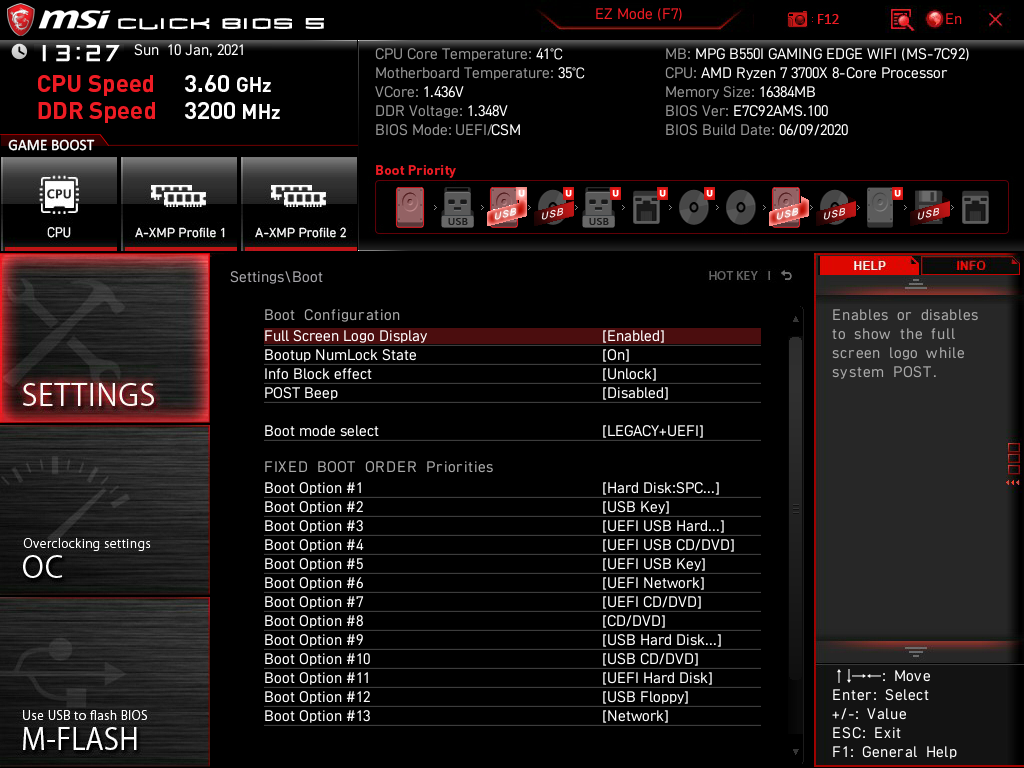
Next as we click on the Settings/Boot menu we are greeted with a ton of options for booting the system. There are options for USB, UEFI, and the standard CD/DVD and Hard drive options. Here you can opt to use the built in Full Screen Logo Display or disable it.
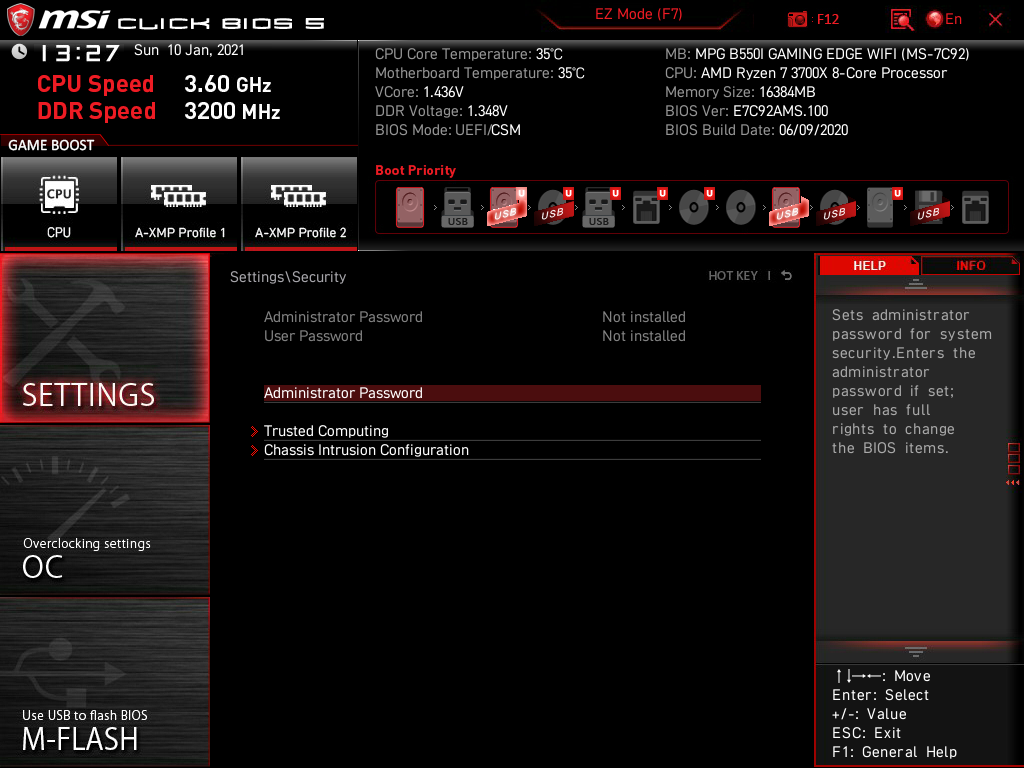
Next brings us up to the Settings\Security screen. Here we are able to include an administrator password to protect the BIOS from being entered by someone that isn’t allowed to make changes in the BIOS. We can also enter the “Trusted Computing” and “Chassis Intrusion Configuration” as well. This is the only three items in this area of the BIOS.
Now let’s take a quick look at the OC main screen. Here we are greeted with a ton of things that overclocker’s are hungry for! This is where a person is able to set up overclocking for the processor and the memory modules.
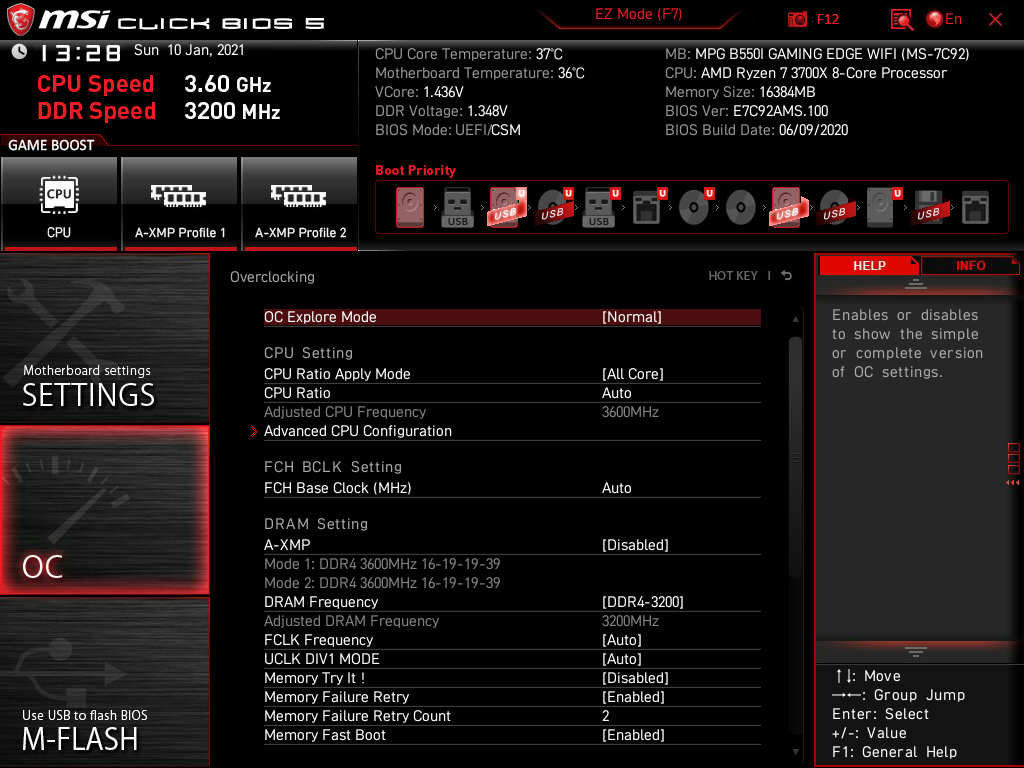
In the Overclocking area, we can adjust the CPU Ration Apply Mode, CPU Ratio, and Advanced CPU Configuration. One can enable or disable the A-XMP DRAM settings as well as manually overclocking the memory modules as well.
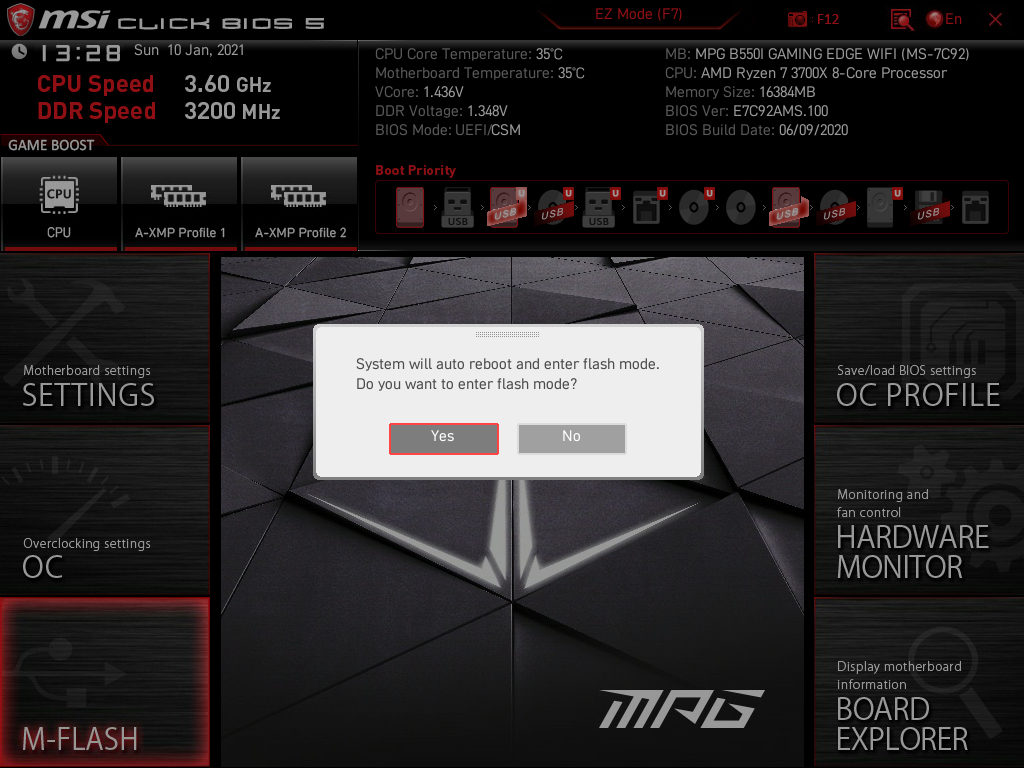
Below the “OC” area is the “M-FLASH” button. This is where you are able to flash the BIOS to a newer version and it warns you that your system will reboot and enter into the flash mode utility. Make sure that if you are flashing to a newer BIOS version that it is the correct one for this specific motherboard!
Next, we enter into the OC Profiles area. Here we can set up many different overclocking profiles for different scenarios or if you just wish to test different overclocking and save them as a profile. You are also able to load profiles from ROM or from a USB device. You can also save profiles to USB devices as well.

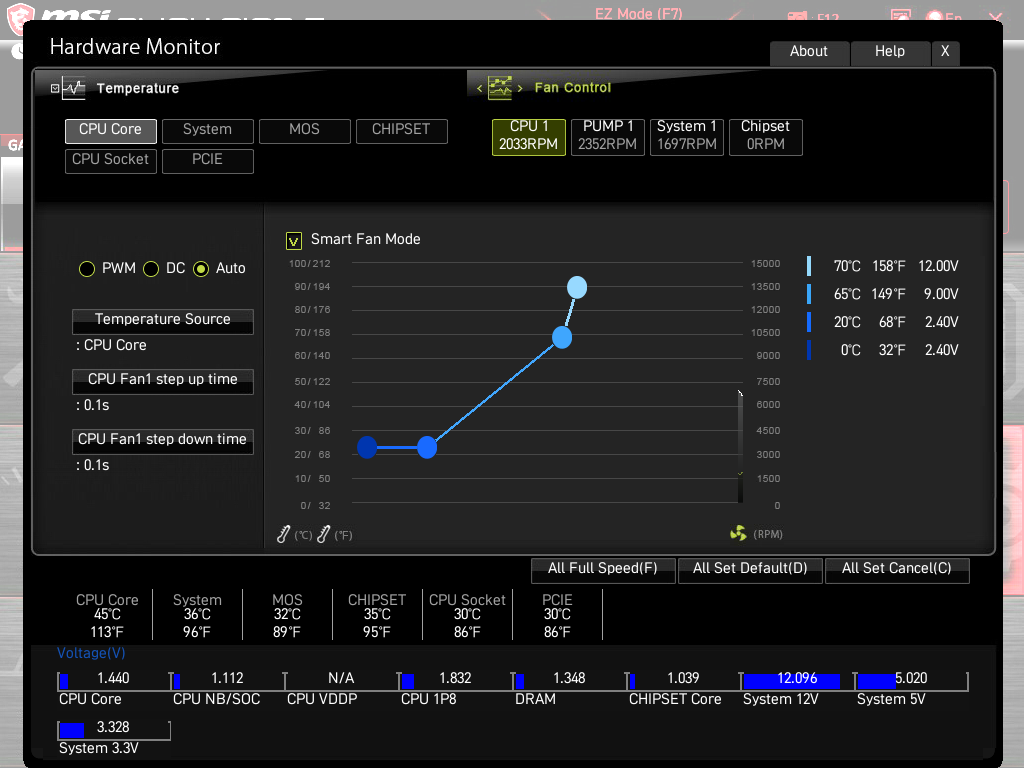
Moving on, let’s take a look at what the Hardware Monitor is all about. This is kind of an awesome spot in the BIOS as a person is able to make a bunch of fan curve adjustments as well as showing current temps on CPU, System, MOS, Chipset, CPU Socket, and even the PCI-E! It also shows all the voltages throughout the system which allows you to see how your power supply is doing.
You can also set all the fans to full speed if you wish. This is a great feature to set when overclocking! You are also able to set the fan speeds to the default or cancel previous settings. At the top of the page, you are able to see the fan speeds as well.
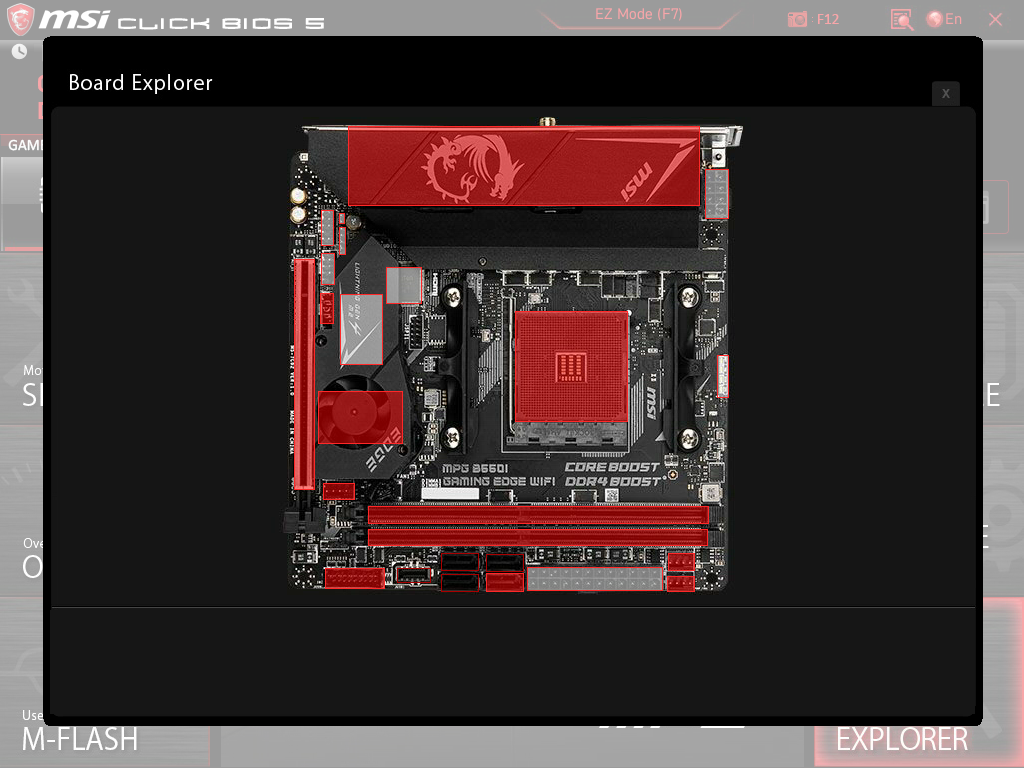
Next, and the final area we are going to take a look at, is the “Board Explorer.” This is a unique area in MSI’s BIOS interface. Things show up red when you click on this area of the BIOS. It shows all the items you have installed allowing you to see just where you plugged things in. If you hover your mouse over these red areas it will give you a description of a lot of information regarding these areas of the motherboard.