BIOS
As always, before doing a motherboard review I always check to see if there is a BIOS update. As with many retail boards, I found a much newer BIOS update and flashed the new update prior to doing any testing on this motherboard.
Like most motherboards, you can enter the BIOS during bootup by hitting the Delete key on your keyboard. Once you enter the BIOS you are greeted with “EZ Mode.” Like almost all newer motherboards, F7 will put the BIOS in Advanced mode. The advanced mode can be done by hitting the F7 or using one’s mouse.
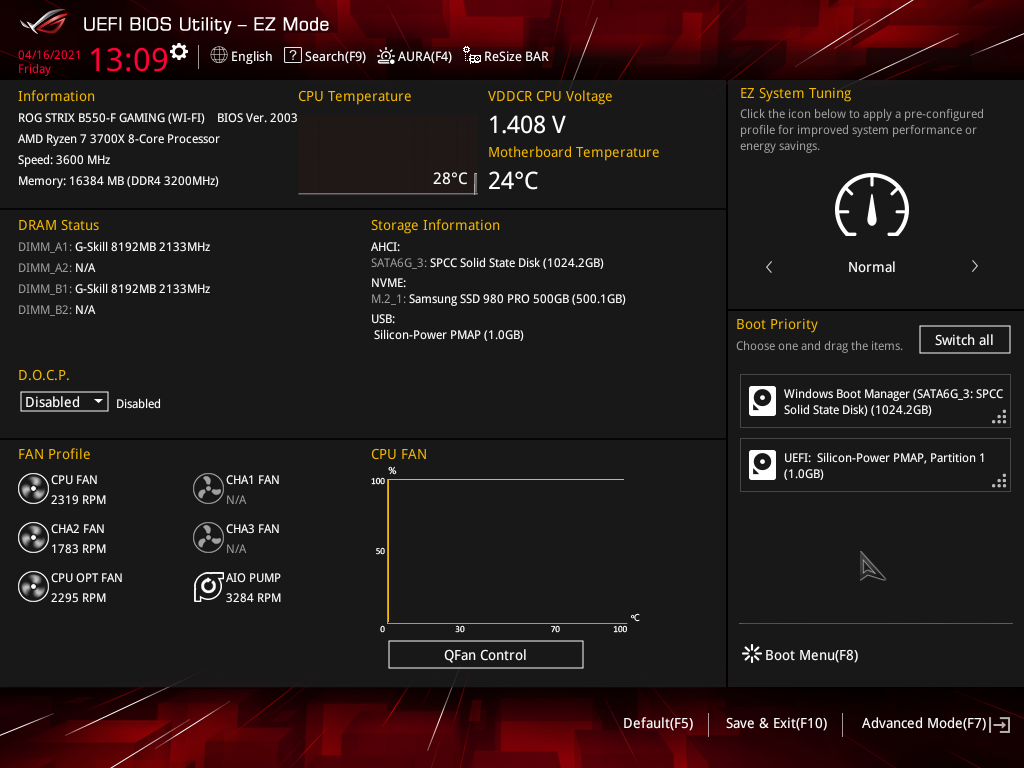
EZ Mode, as one would expect, really doesn’t allow for many changes in the system. EZ mode is more of an informational area than being able to tweak the system. The main thing that one can do is what ASUS calls “EZ System Tuning.” This allows a mild overclock or even a mild underclock of the system. One can also enter into ASUS’ QFan Control through the EZ Mode BIOS screen.
One doesn’t really get into the meat of the system until you enter the advanced mode of the BIOS. Here is where a person is able to really start delving into overclocking, fan controls, and the advanced motherboard settings. This is also where you are able to set up memory timings such as A-XMP profiles.
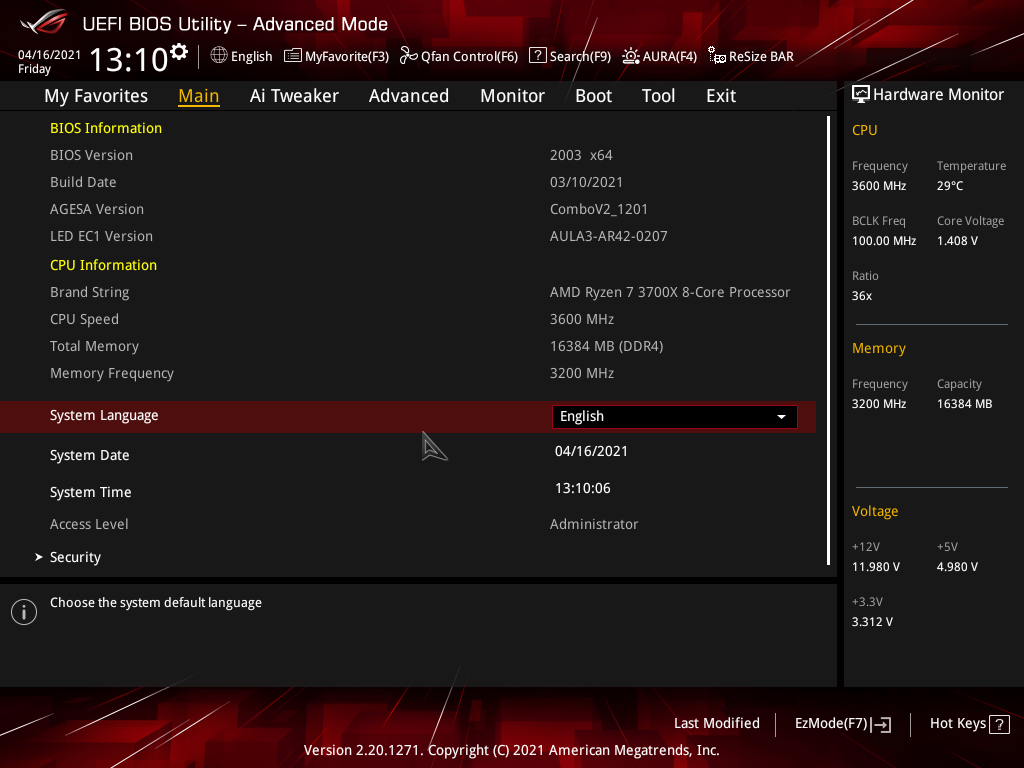
There are many settings in the Advanced Mode of the BIOS. This includes the Main, Ai Tweaker, Advanced, Monitor, Boot, and Tool. Also note that on the right-hand side of the window you will be able to see an overall picture of the hardware monitor showing you your CPU frequency, temp, BCLK frequency, and Core Voltage. It also gives you the memory frequency and capacity as well. Below that you can see a quick shot of how your power supply is doing by giving you the voltage readings to the +12v, +5v, and +3.3v. Kind of a nice feature.
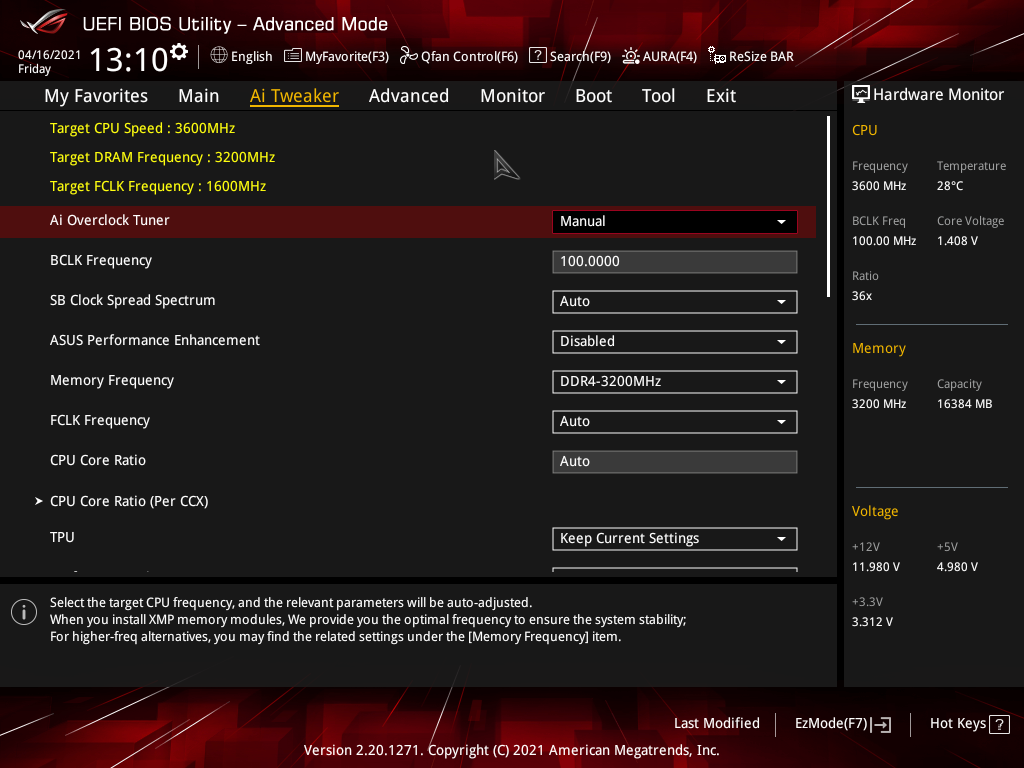
Next, we can take a quick look at the Ai Tweaker window. Oh man, this is where the fun begins!!! This is where a person can start tweaking your system, overclocking the CPU, overclocking the memory, and also adjust voltages.
WARNING: Overclocking can damage the CPU, RAM, and motherboard if you are not familiar with this aspect in the BIOS.
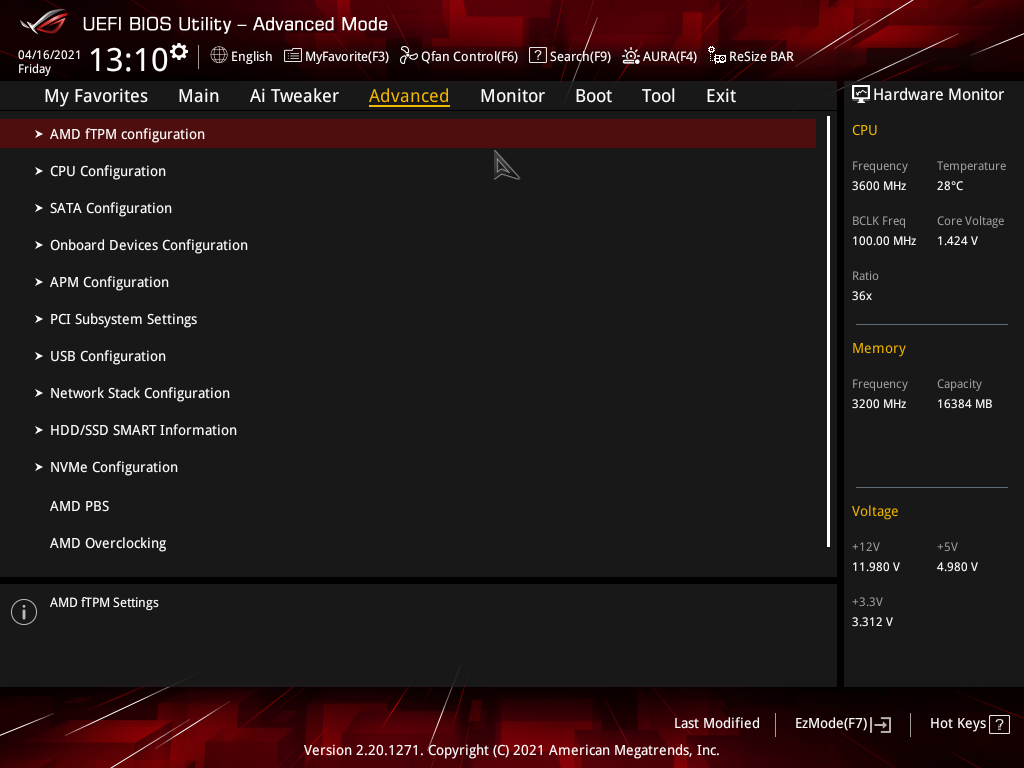
Next we have the Advanced window. There are many things that can be done in this specific window. CPU Configuration, SATA configuration, Onboard Device configuration HDD/SSD SMART Information, and NVMe Configuration, just to name a few.
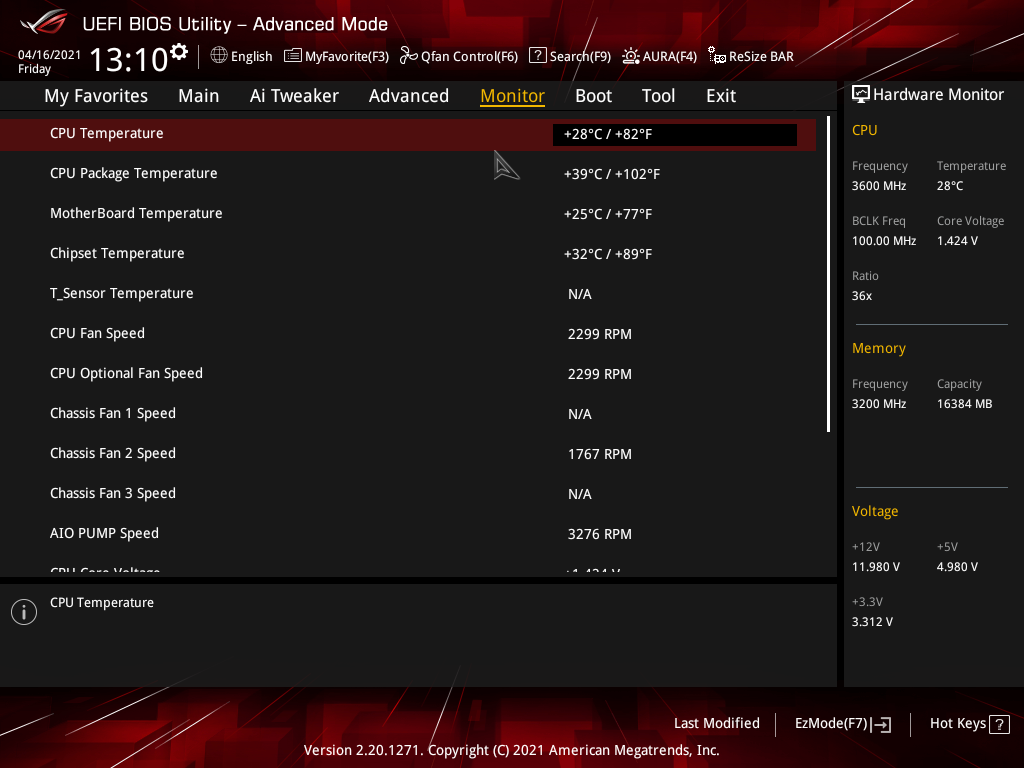
Next is the Monitor window. This tells you the current temperatures for your CPU, motherboard, and chipset. It also gives you the current fan speeds for all the fan headers including the chassis fans. It also gives you current voltage reading on your CPU and memory.
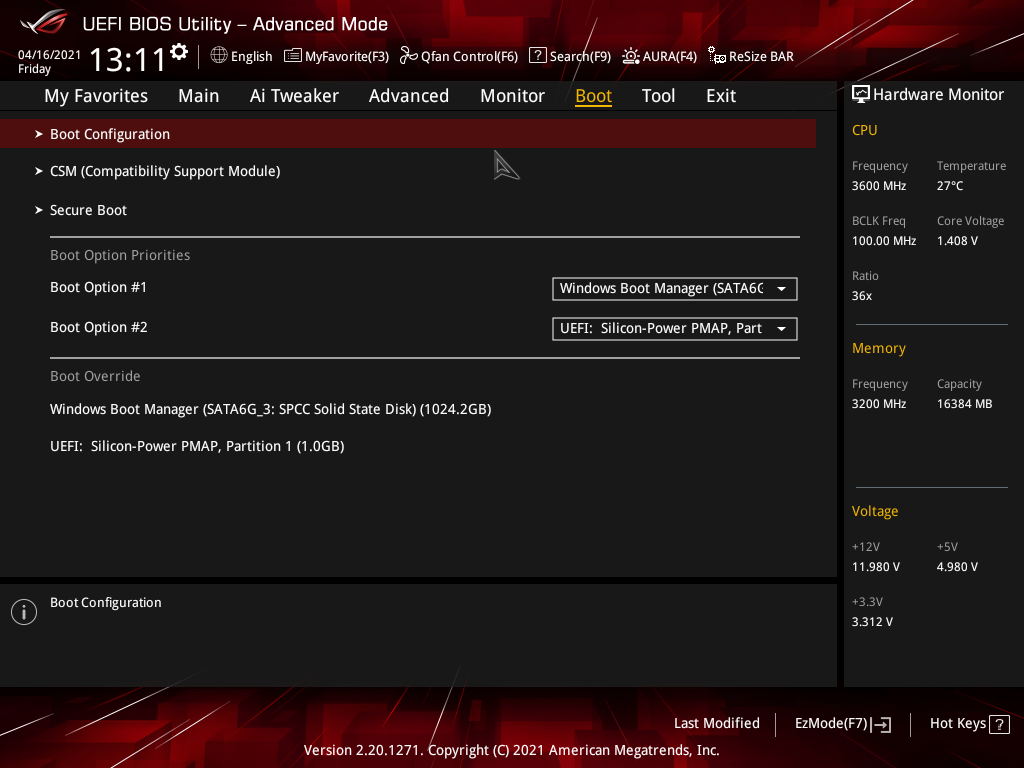
Now, the next window is the Boot window. This is where you can set up what you want to boot first and second. It also includes the Compatibility Support Module, should you need this option. You are also able to set up the Secure Boot option here as well.
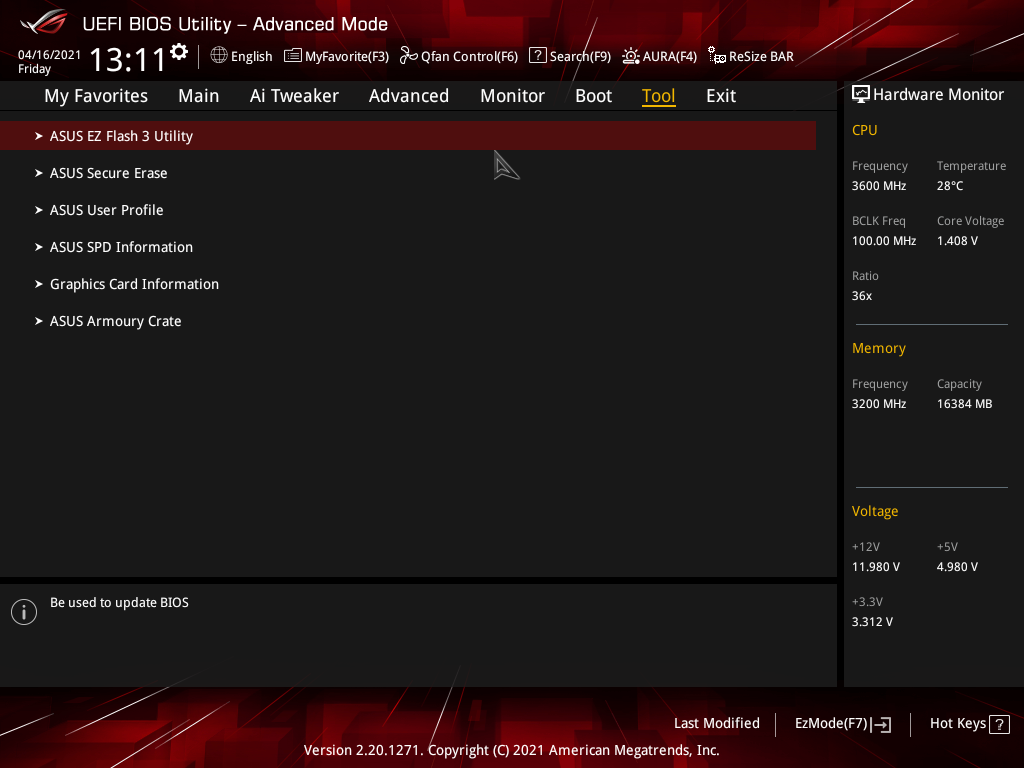
The final window prior to the exit window is the Tool options. Here you can flash the BIOS with the ASUS EZ Flash 3 Utility. This allows the user to enter into a program that allows the user to flash the BIOS to a different newer version.
You can also set up the ASUS Secure Erase, User Profile, and find information on the SPD and graphics card you have installed. You are also able to set up the ASUS Armoury Crate for some RGB bling in your system.
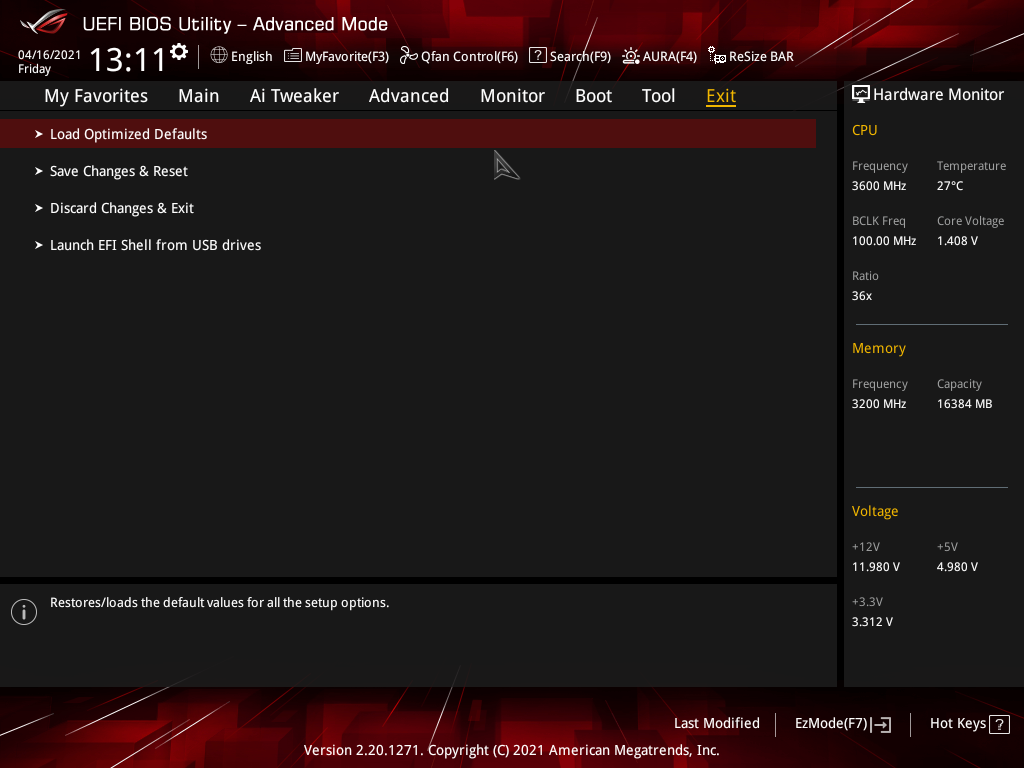
And, finally we see the Exit window. Of course, this is where you can save or discard any changes you have made with the BIOS, load the optimized default settings, and are able to launch EFI Shell from USB drives.