Introduction
We have a preliminary look at graphics settings and features performance in the new game Alan Wake 2 today. Please note that this is a preliminary at the game features, and focuses purely on the aspect of testing the quality options performance and comparing them, with a single graphics card. We haven’t had a lot of time to test this, but testing is being done on the release version of the game, and we will have GPU performance comparisons in this game in the future. For now, let’s take a look at how the game quality settings affect performance in the game, and how much Ray Tracing, DLSS 3.5 Ray Reconstruction, DLSS upscaling, and Frame Generation all affect performance.
We will compare each Quality Preset in the game, to see how the quality presets scale in performance from High to Medium, to Low, and we will test the Ray Tracing Preset Quality Modes and see how they compare from High to Medium, to Low. We will also toggle Ray Reconstruction, and Path Tracing in the game to see how those affect performance. Then we will give you some overall impressions and suggestions for graphics settings in the game if you want the best experience. This is a preliminary test, and there is more to come.
Without diving into too much granularity here, Alan Wake 2 is a brand-new game that has just been released developed by Remedy Entertainment and published by Epic Games. Alan Wake 2 is based on the Northlight Engine game engine, which is an in-house engine developed by Remedy. This game engine is very advanced, and for Alan Wake 2 ups the ante for graphical fidelity in games, and many think this game could be the next “Crysis” meme.
Alan Wake 2 supports Global Illumination, Ray Tracing, and features NVIDIA DLSS 3.5 with Ray Reconstruction and Frame Generation with Super Resolution. Alan Wake 2 also supports FSR 2 out of the gate, so both upscaling options are available. This game is going to be known for its incredible lighting techniques and quality and is already impressing many gamers. While we could certainly spend a lot of time deep-diving into the 3D rendering techniques used, and how this game is progressing gaming, we want to get on with the testing now so we can show you how the quality settings perform and make some suggestions for your gaming experience.
Graphics Options
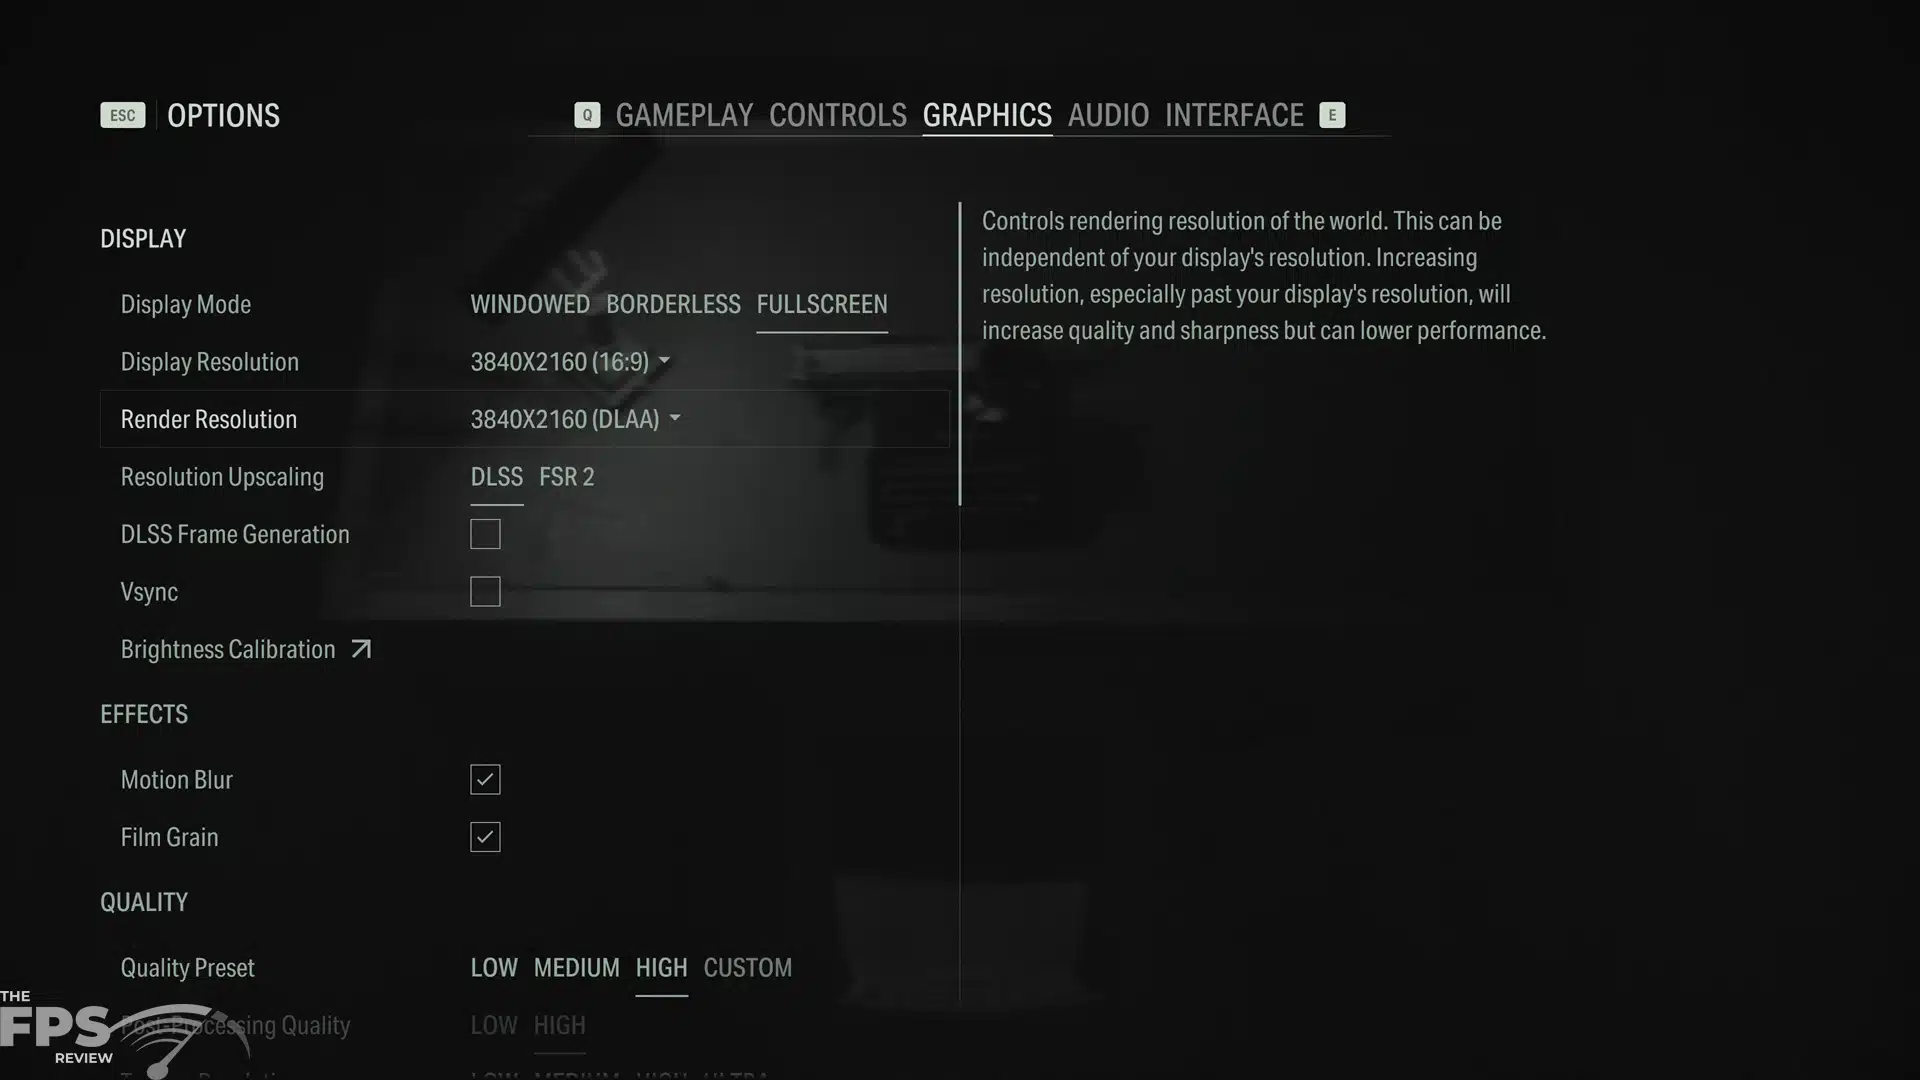
When you head to the Options menu, and select “Graphics” at the top, you will have a scrolling window with all the graphics options available. Alan Wake 2 has a good amount of video options for tweaking performance in several categories and includes separate Ray Tracing options at the bottom as well. The first thing you will want to do is make the game Fullscreen for the best performance, ours did not default to this at first launch.
Second, you will want to pay attention to the Display Resolution and Render Resolution options, these do different things. What is becoming more common now in the latest released games is to show the upscaling quality mode in the form of the Render Resolution rather than strictly calling it Quality, or Performance, or Balanced. Those terminologies are still there, in Alan Wake 2, but as so far as upscaling goes, the first thing you’ll see it denoted by is the Render Resolution which is not your Display Resolution.
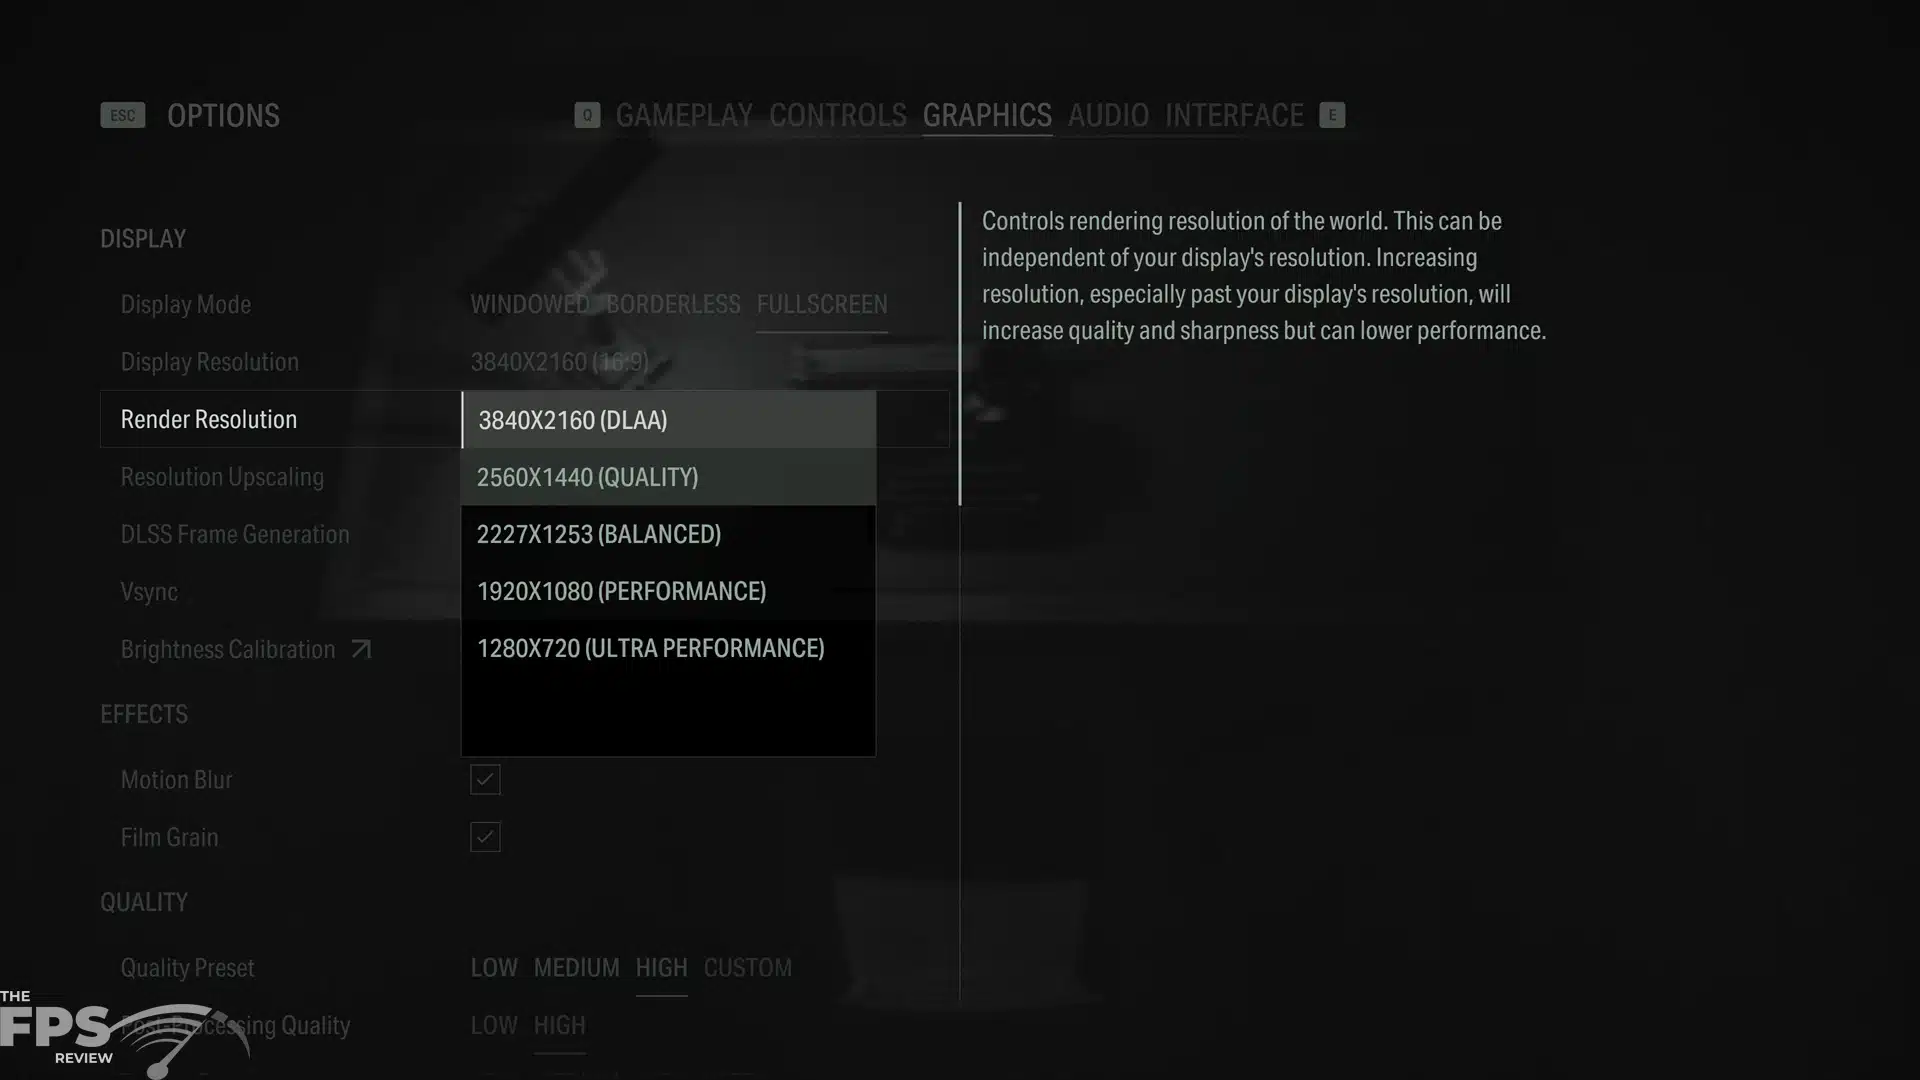
Therefore, first set your Display Resolution to the native resolution of your monitor, that is what the game will display at, it’s your traditional resolution setting. Next, you will want to either select DLSS or FSR2 as the Resolution Upscaling algorithm. When you do this, if you then bring down the Render Resolution drop-down box you will see that it does give you the option to render the game at your display’s native resolution, just select the same resolution as your display which is also marked “DLAA” in the drop-down box with DLSS.
This game will render the native resolution with DLSS DLAA technology. If then you want to benefit from DLSS (Super Resolution) then you select the quality mode, and it will show you the render resolution that it scales up from. For example, Quality DLSS renders at 2560×1440 for us here and will upscale it to our monitor’s resolution of 3840×2160. In our performance tests, when our graphs show “Quality DLSS” this is the upscaling mode we are using.
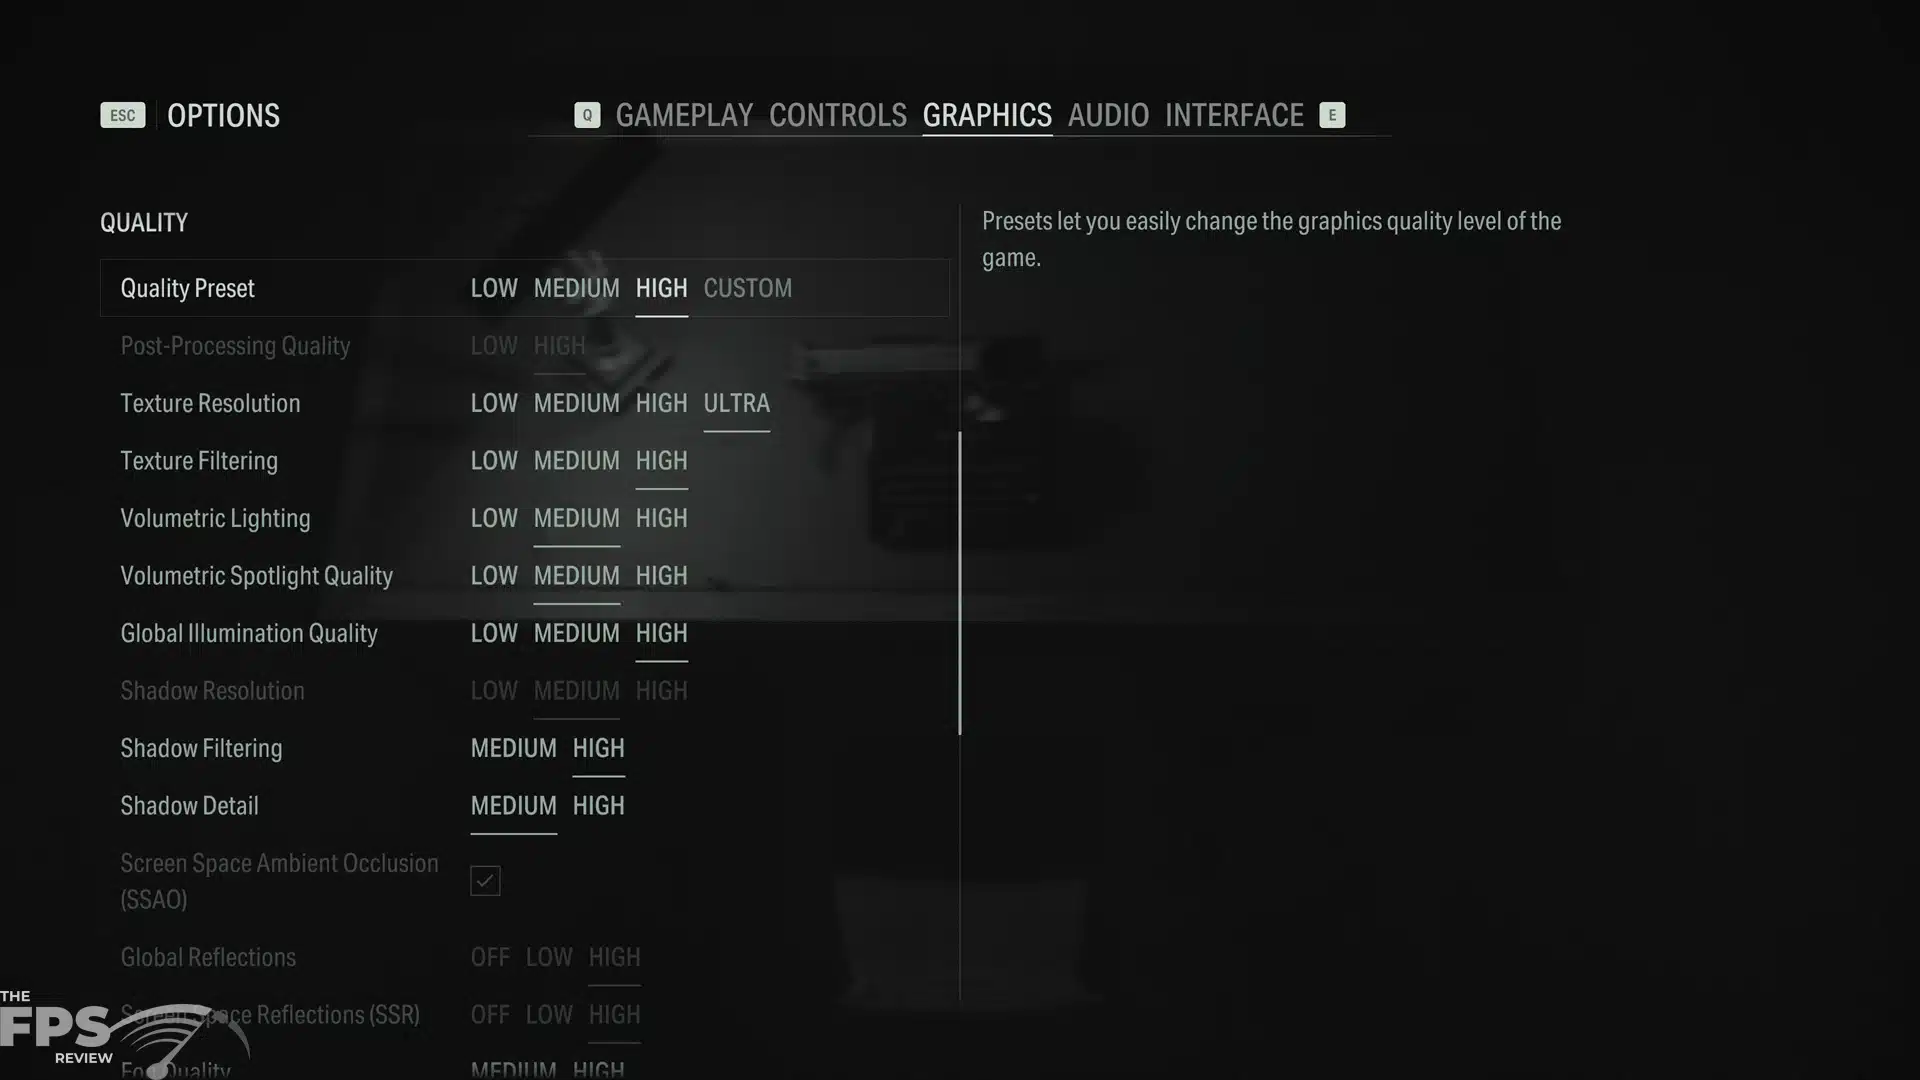
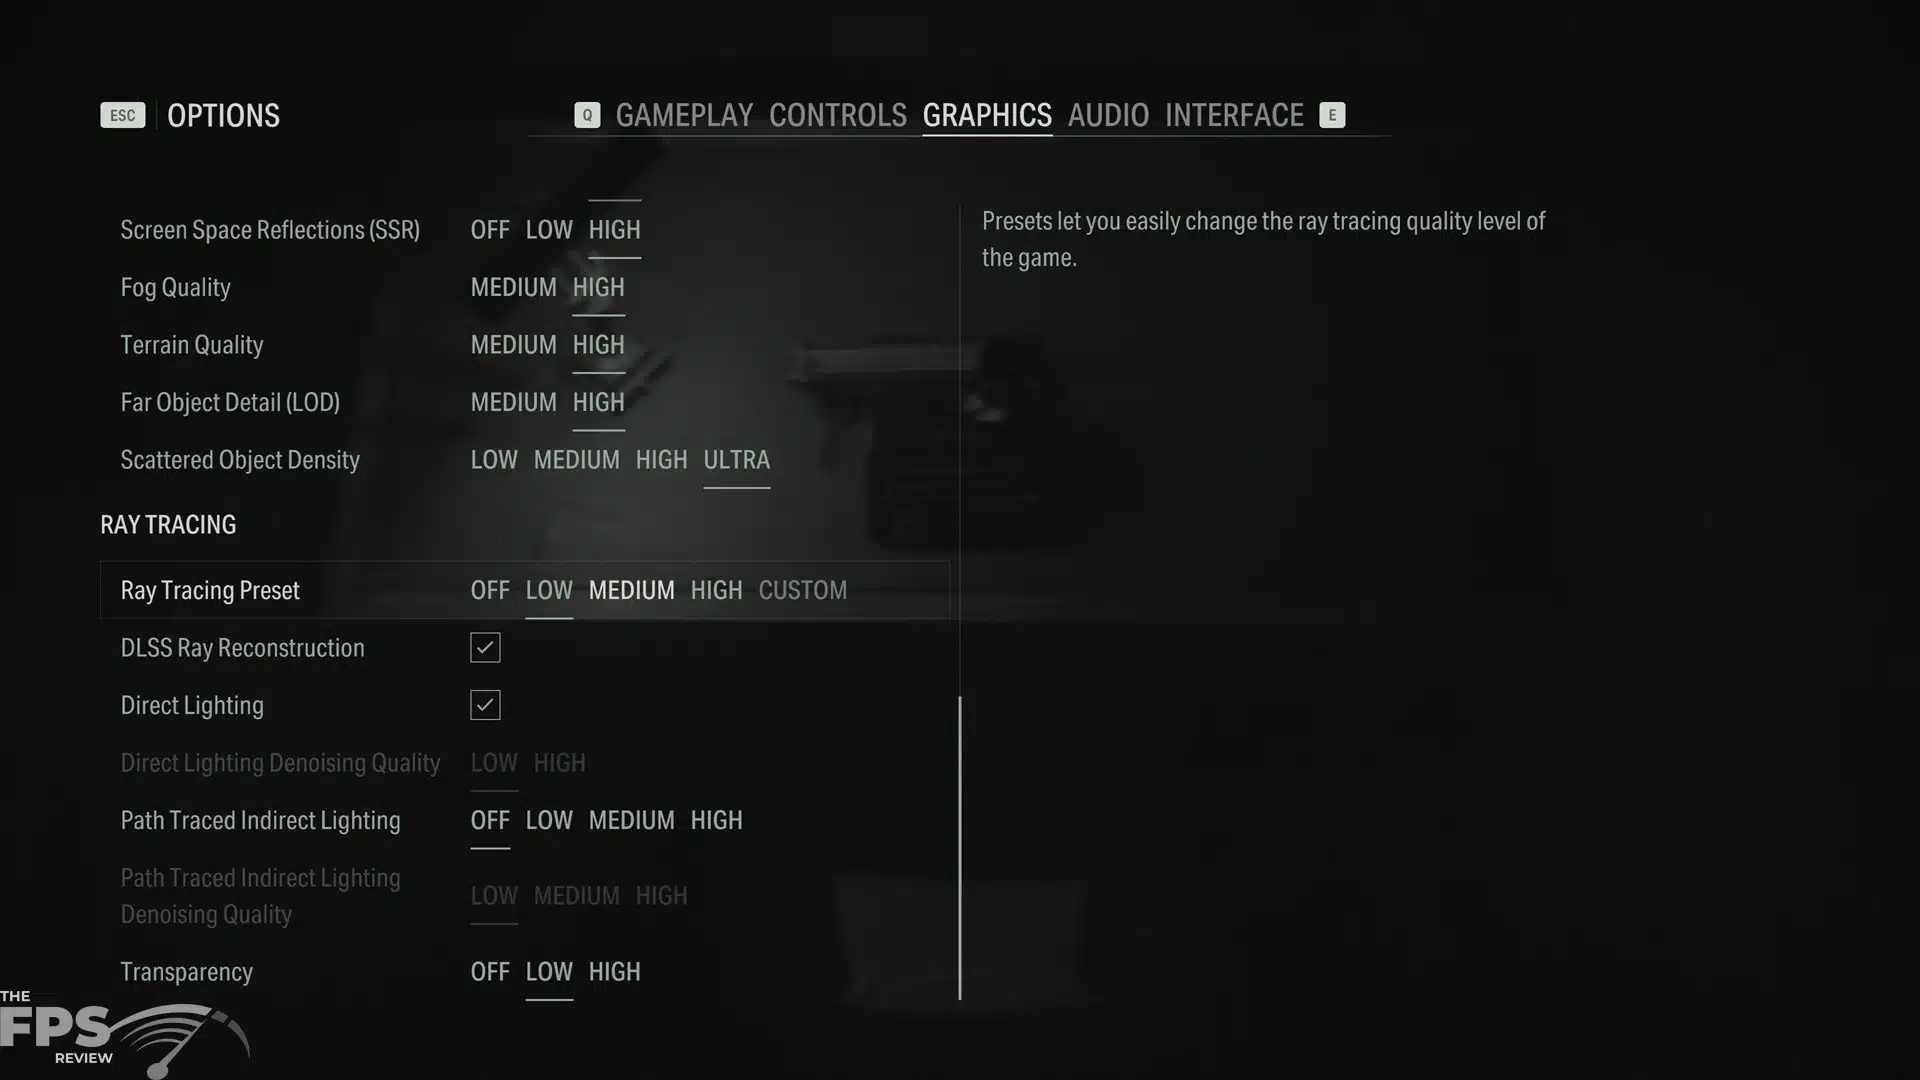
After you are done setting the resolution and upscaling, then you want to mess with the Quality Preset settings. This game has three baked-in presets, Low, Medium, and High. However, it is very important to note that High does not actually enable the highest game quality settings. As you can see above in the first screenshot, we have the presets set to “High”, however, several options are still at “Medium.”
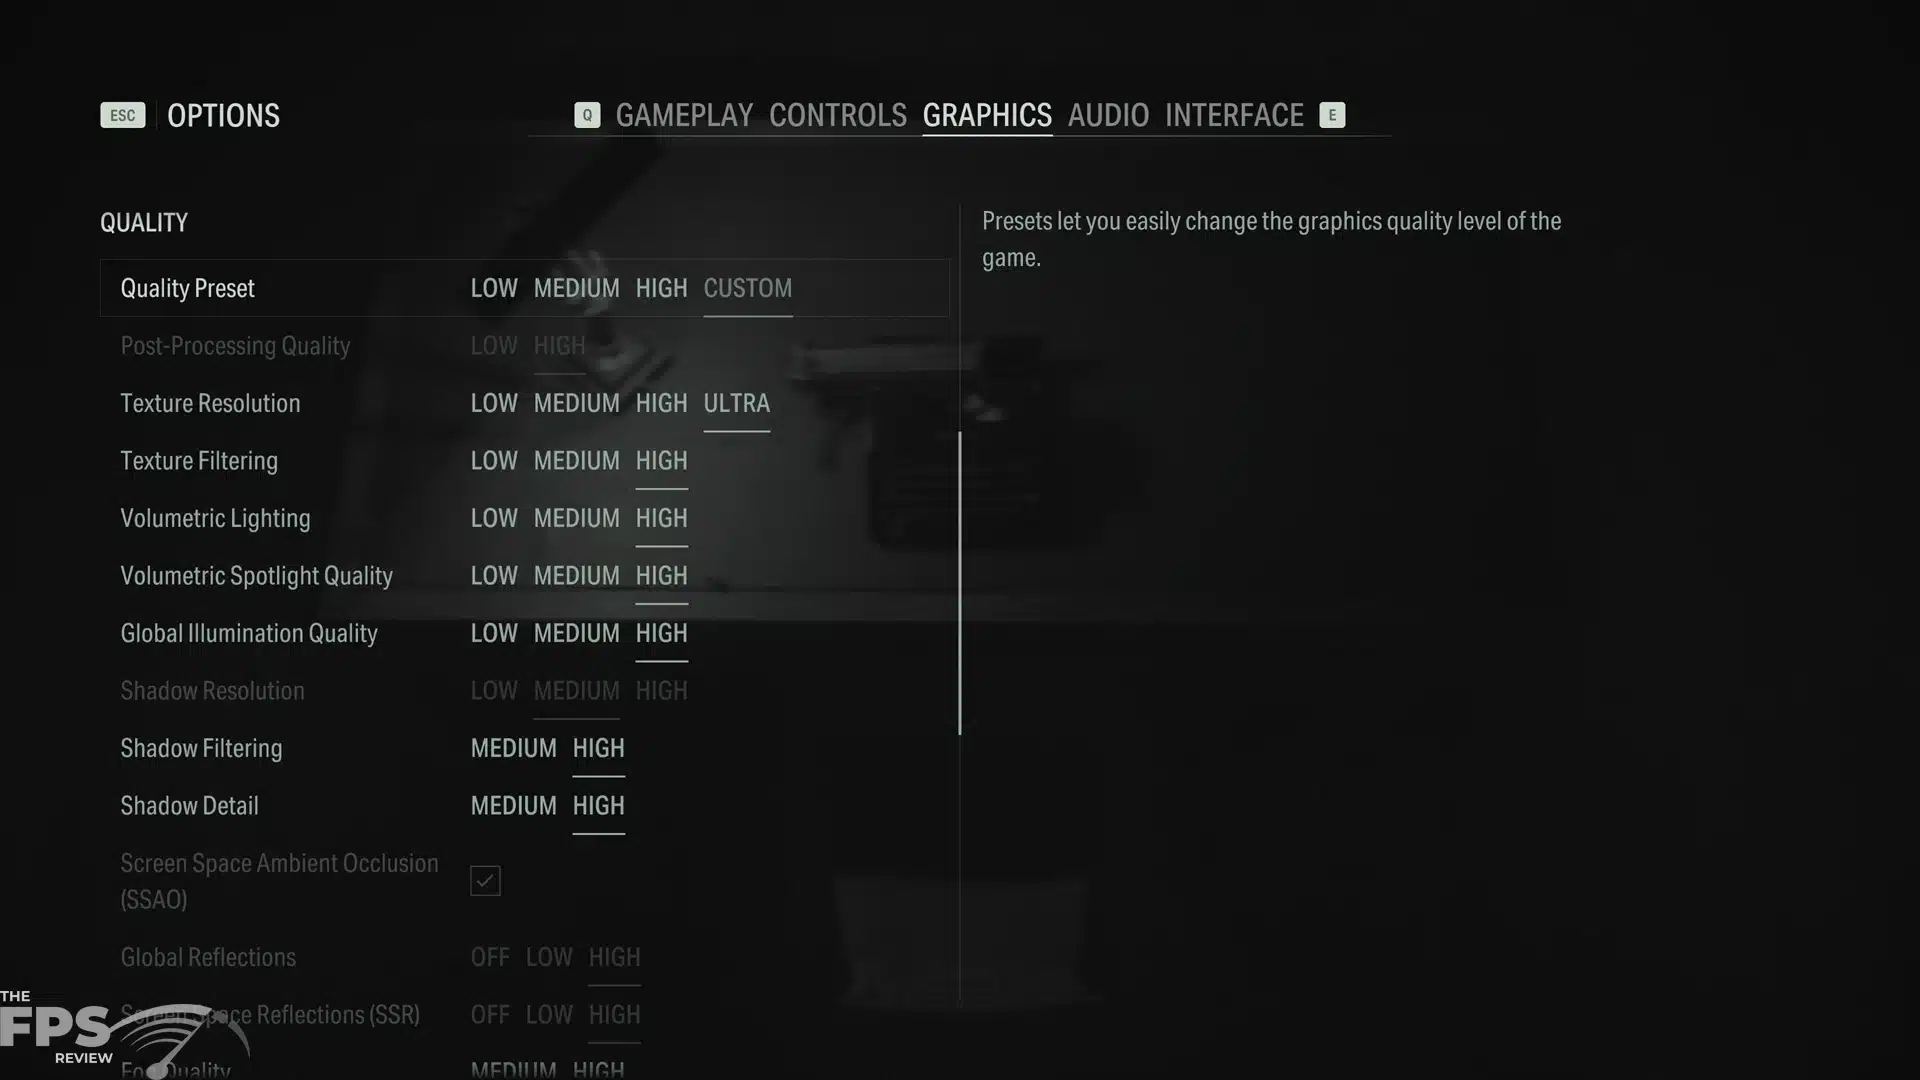
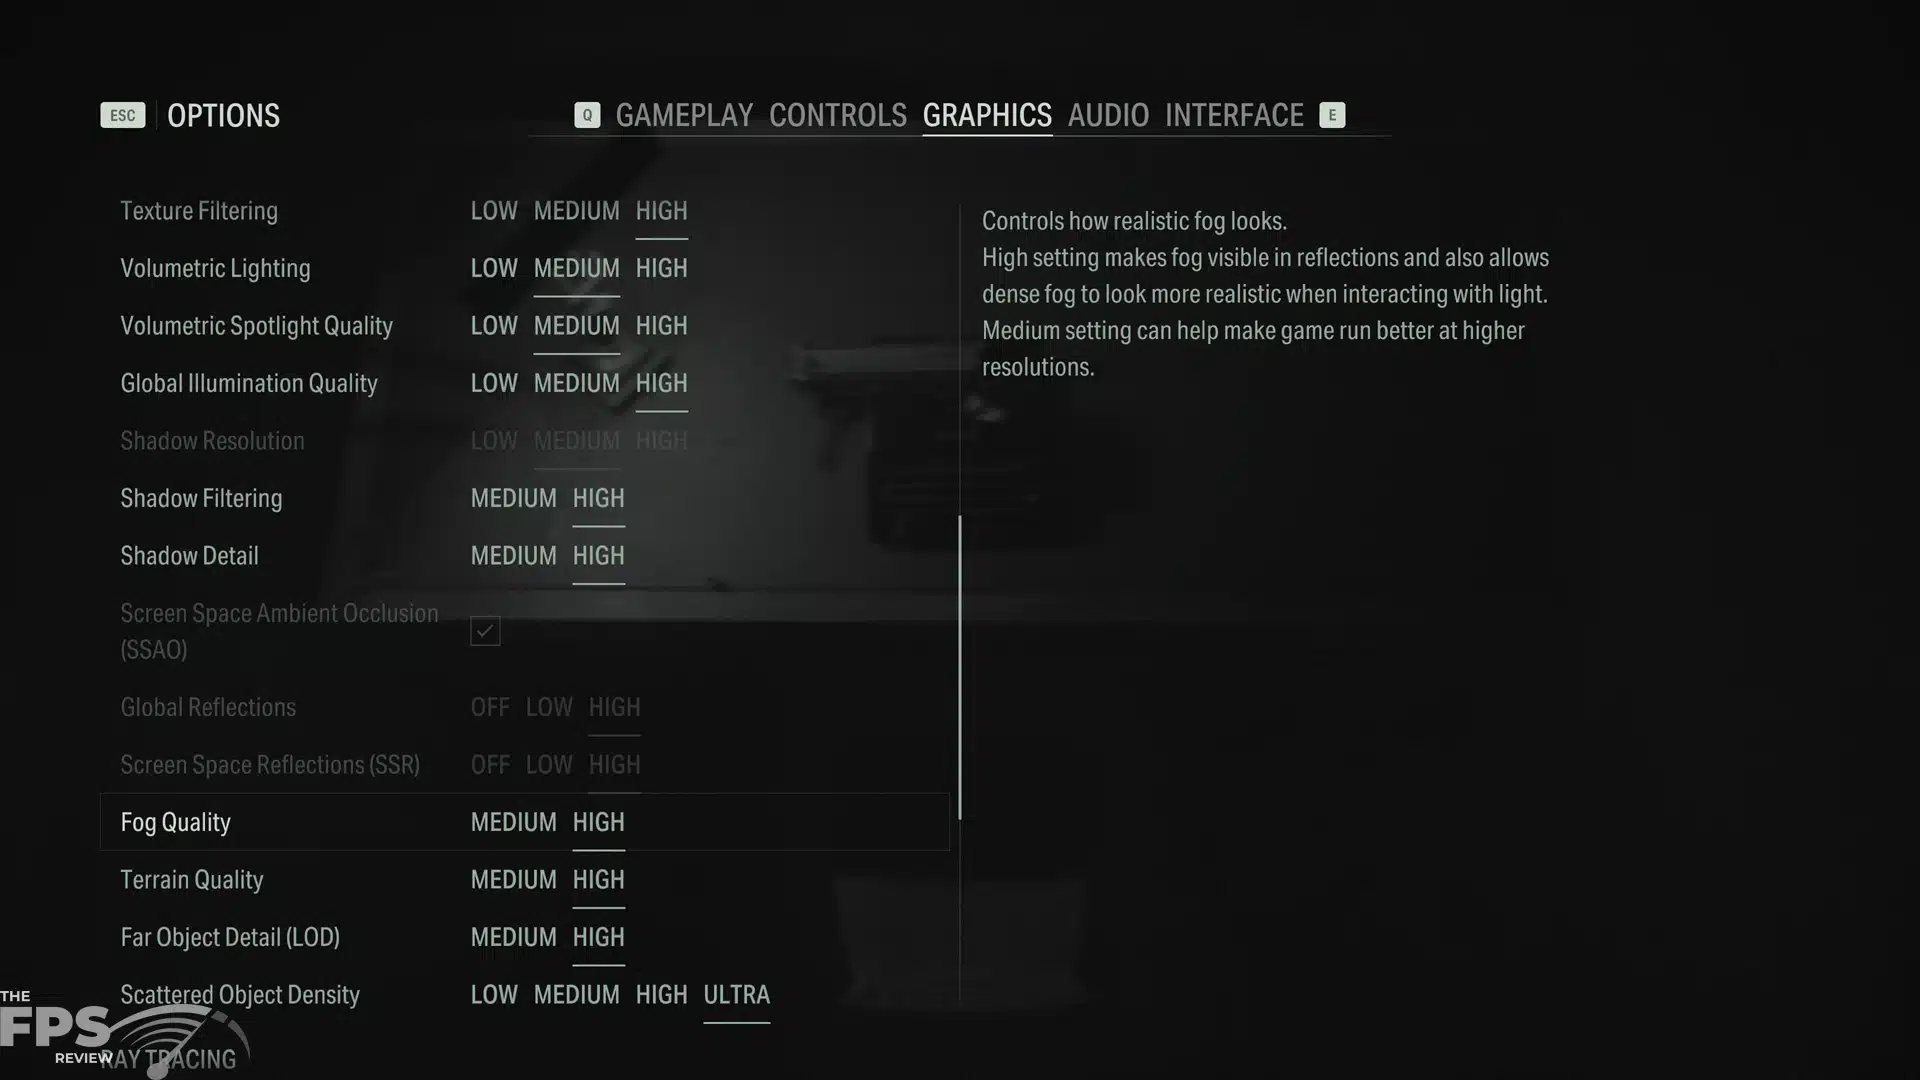
We find that Volumetric Lighting is still at Medium, Volumetric Spotlight Quality is still at Medium, Shadow Resolution is still at Medium, and Shadow Detail is still at Medium. Now some of these options are greyed out when you have Ray Tracing enabled at Medium or High. Therefore, as you can see in our second screenshot we can actually manually increase this option to “High” and now the preset slider moves over to “Custom.” In the last screenshot, it just shows that the remaining options for Fog Quality, Terrain Quality, LOD, and Object Density are in High or Ultra with the High preset. So just be aware that the High Preset doesn’t actually set the highest game quality settings, you manually have to enable the highest quality settings for that. We wish the game had a “maximum” setting that just did it with a one-click option.
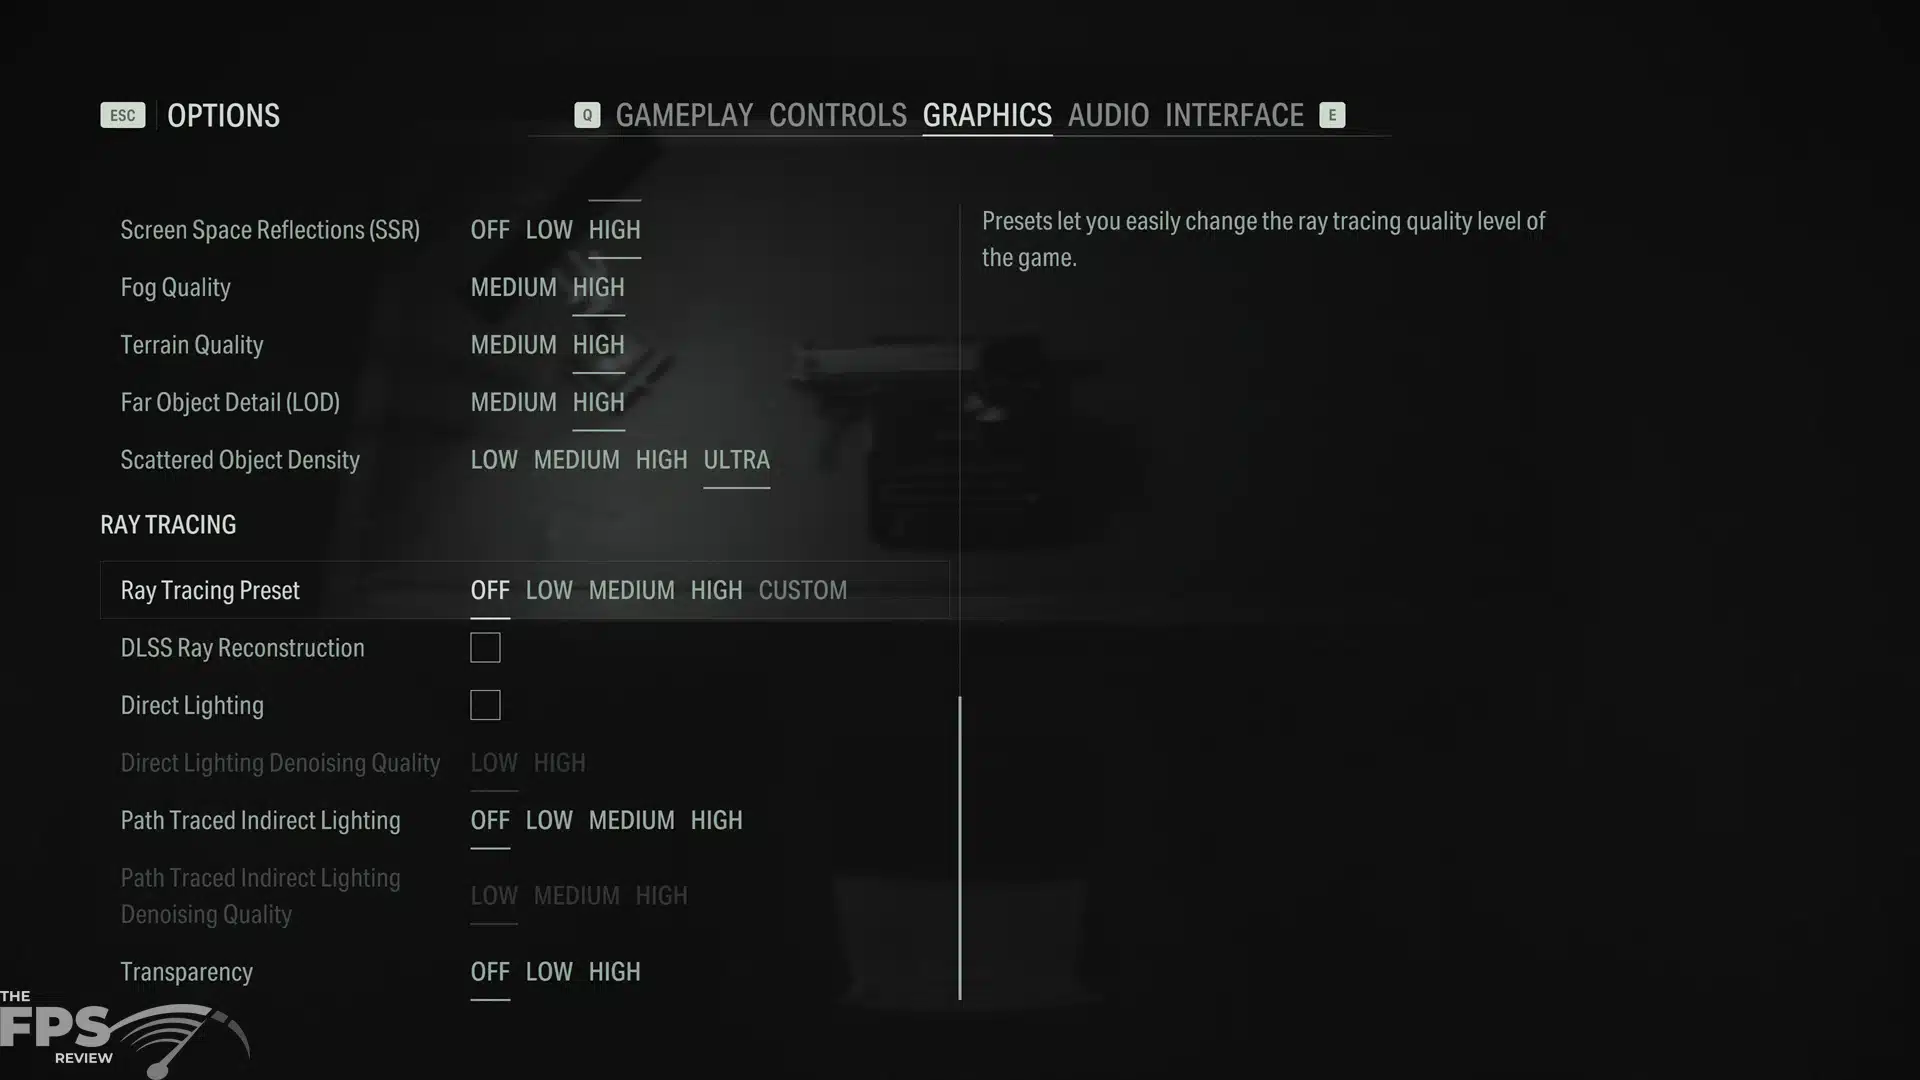
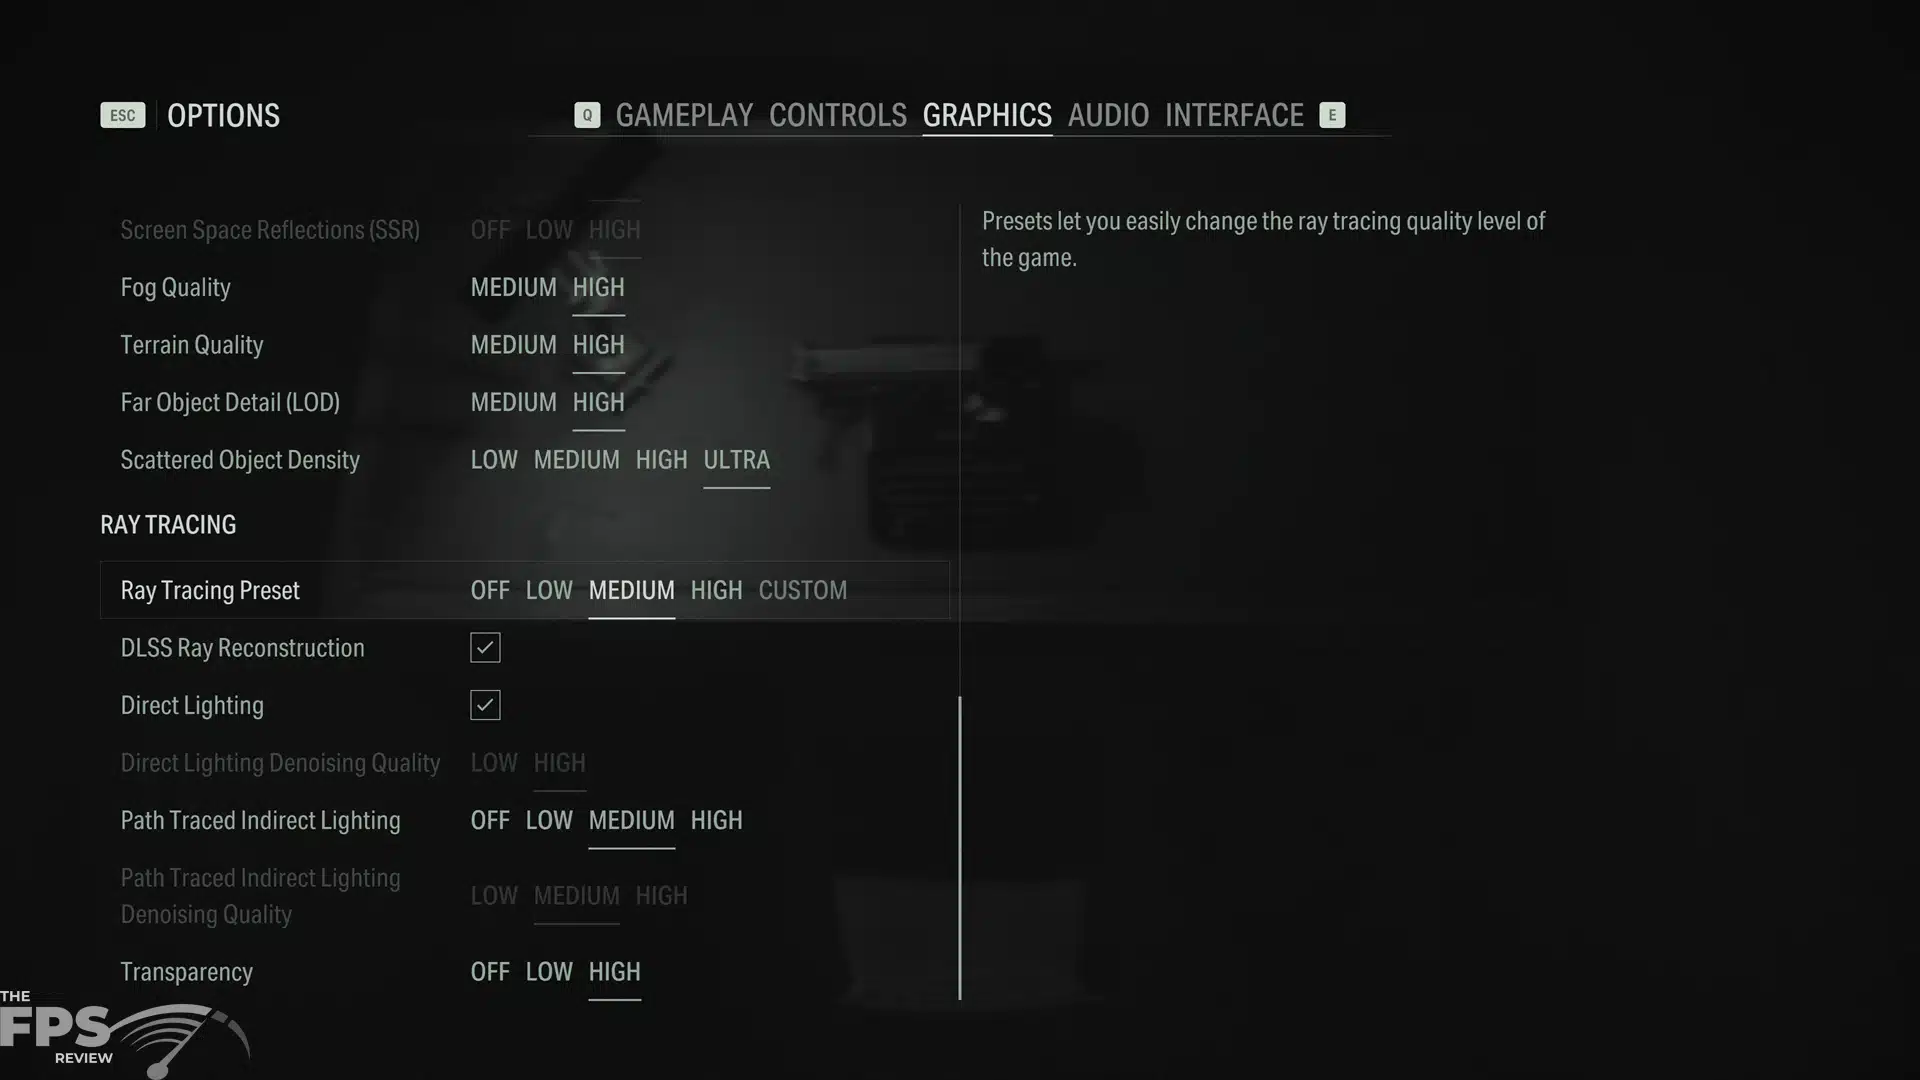
Now comes the fun option, Ray Tracing. There are three built-in Ray Tracing presets, and naturally you can turn it all OFF. The three options are Low, Medium, and High Ray Tracing but be aware that using Medium or High enables Path Traced Indirect Lighting and DLSS Ray Reconstruction is ON by default in every quality mode for Ray Tracing, but you can turn it off manually.
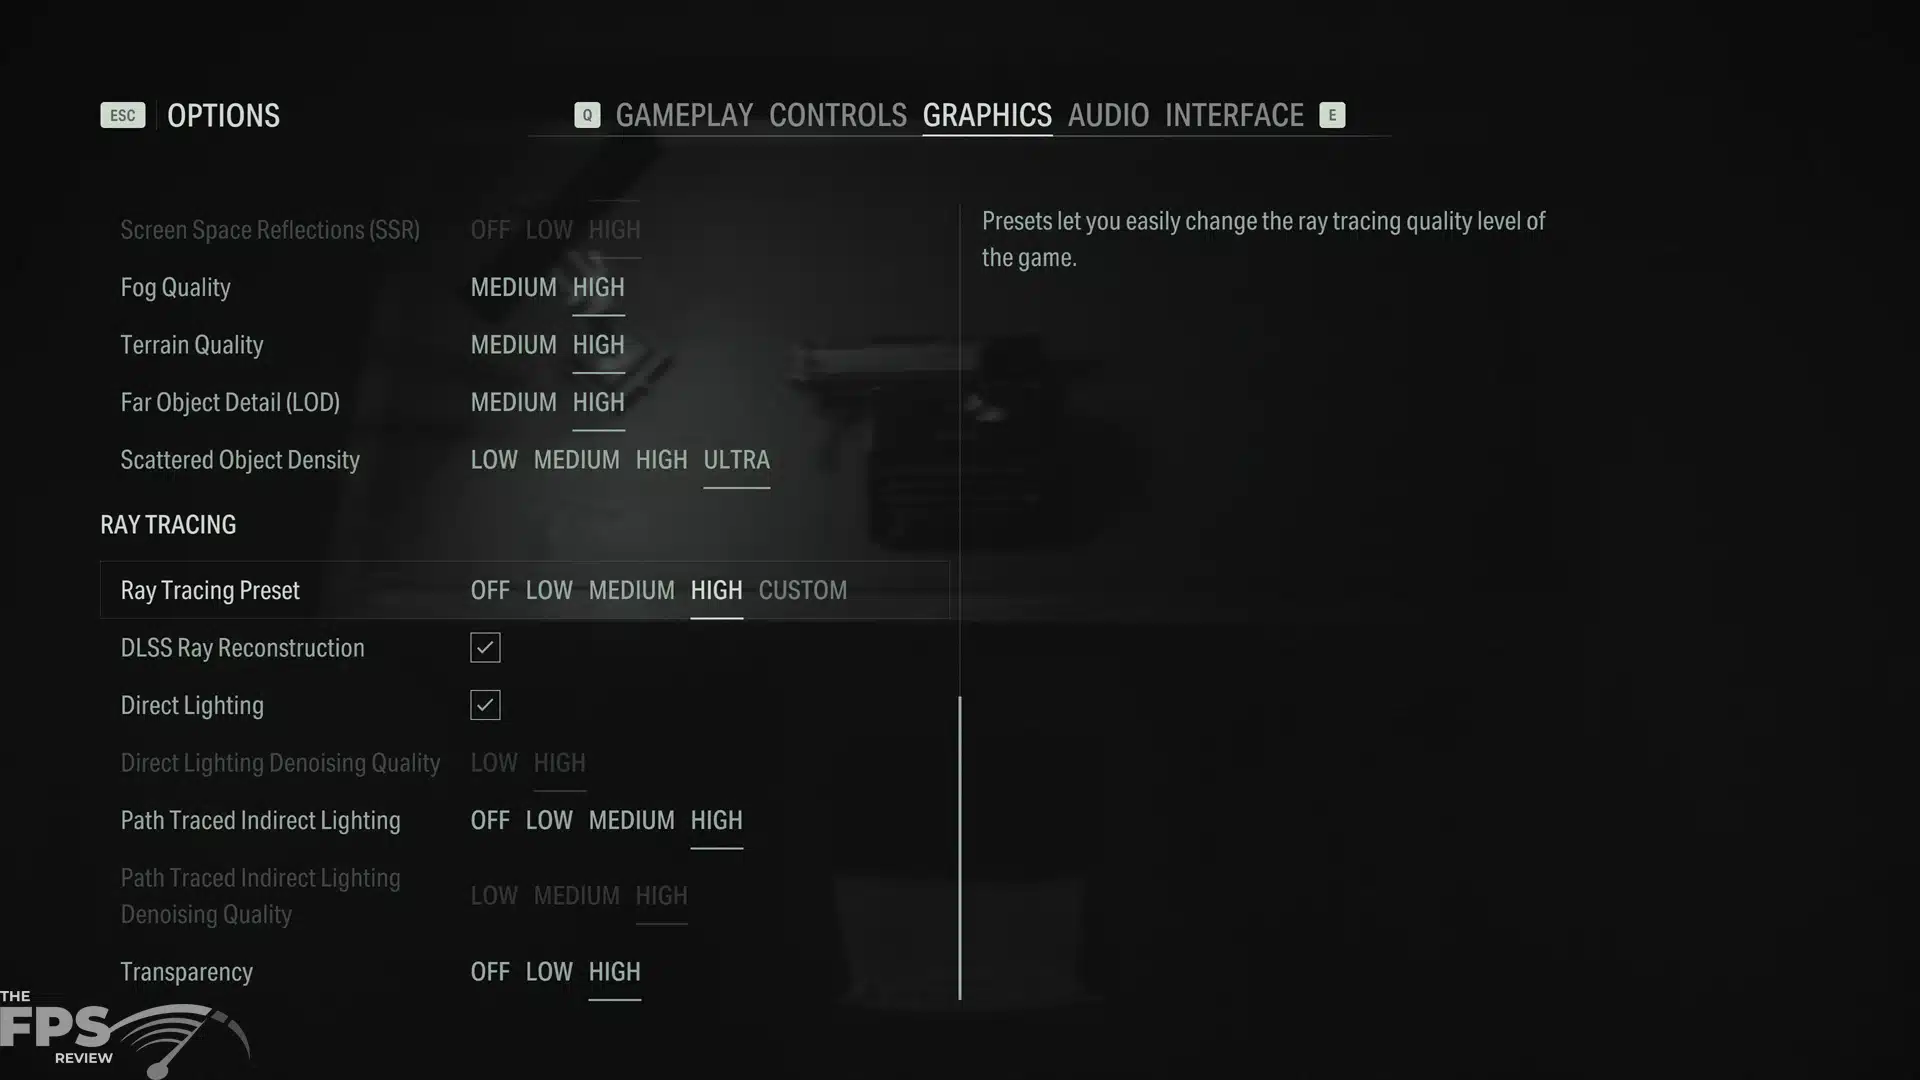
Okay, so starting with the LOW Ray Tracing option you will notice that DLSS Ray Reconstruction turns on by default, but Path Traced Indirect Lighting is OFF by default on the LOW preset. Now notice that when you turn on MEDIUM Ray Tracing the Path Traced Indirect Lighting kicks in to the MEDIUM quality level. Then, turning on the HIGH Preset turns on Path Traced Indirect Lighting to the HIGH level.
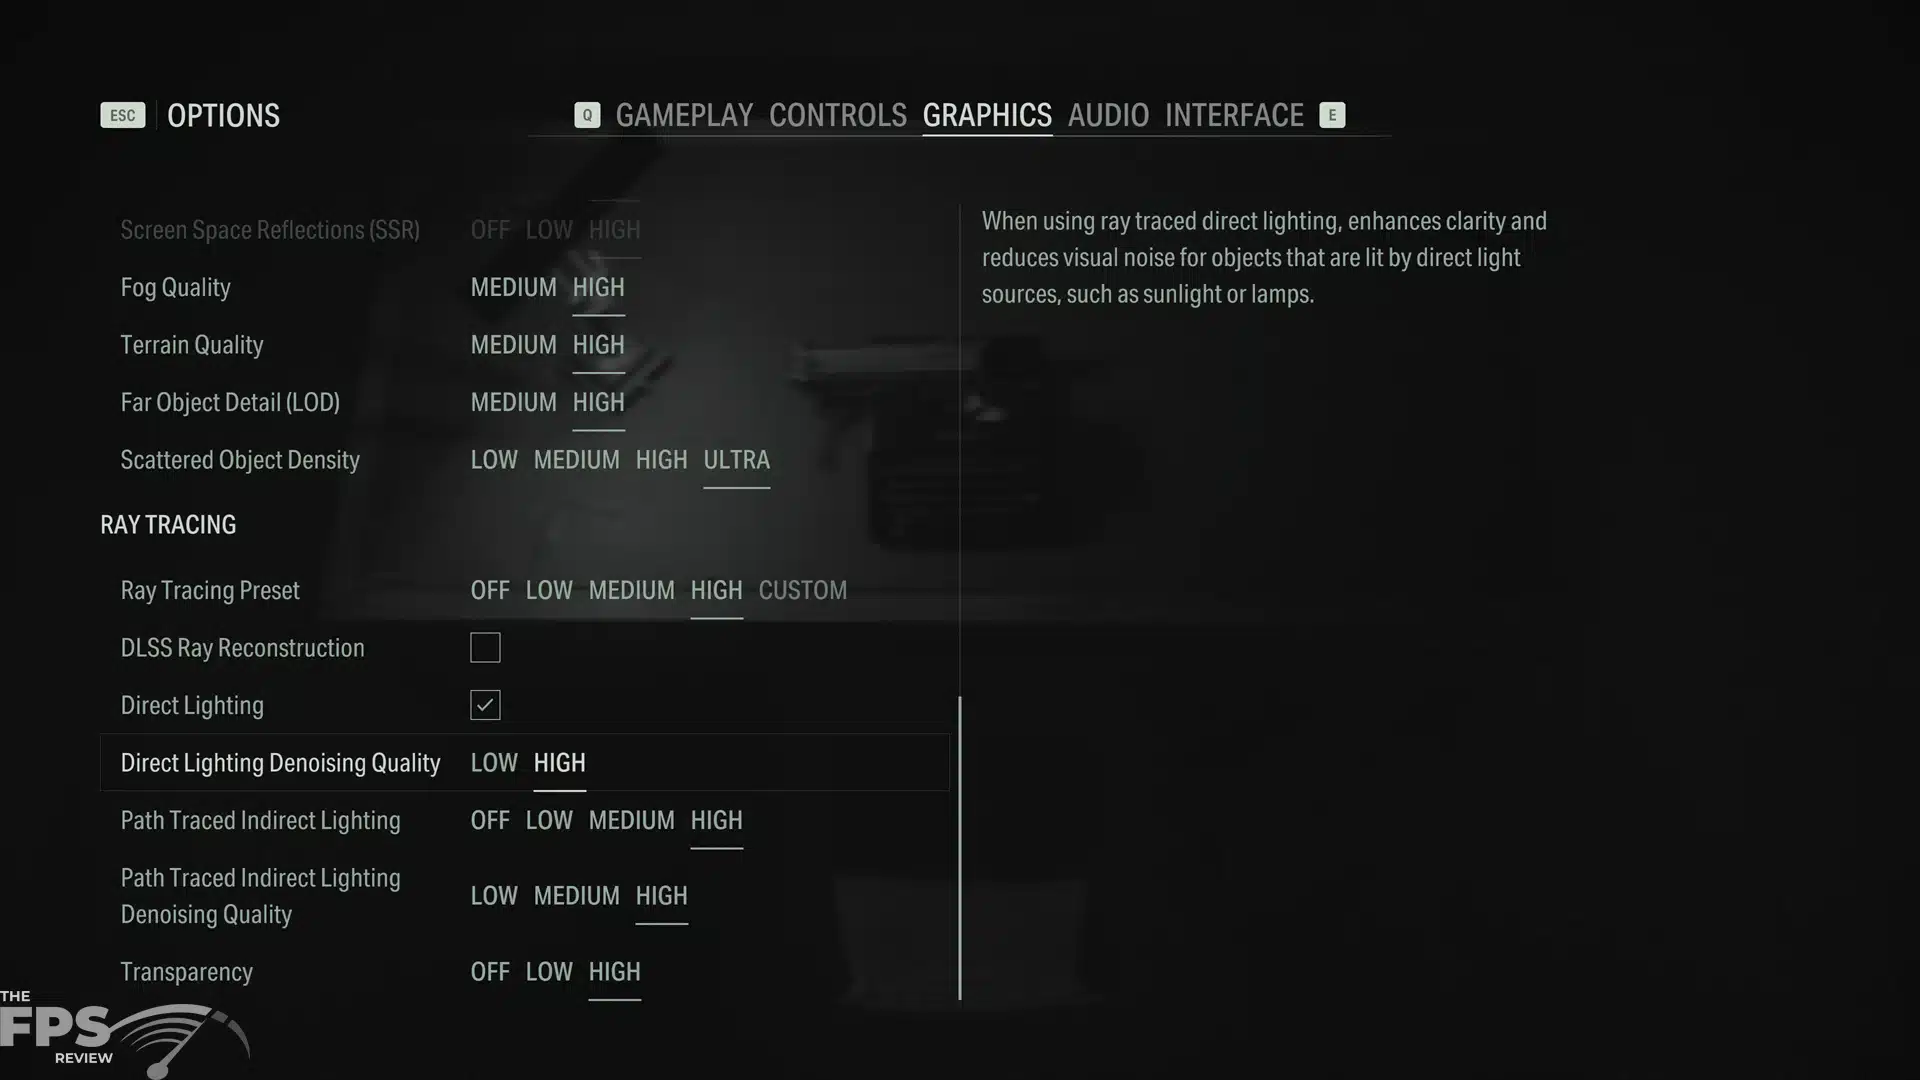
Though DLSS Ray Reconstruction is turned on with supported cards by default, you can optionally disable it by checking it off. When you do this, two Denoising options come up that you can change. You will then have access to the Direct Lightning Denoising Quality option and the Path Traced Indirect Lighting Denoising Quality option.
You can set the quality of the traditional game denoiser here, which the game uses if you are not using DLSS 3.5 Ray Reconstruction. However, if you are, then Ray Reconstructions takes over the function of the game denoiser and thus the quality settings are greyed out. Also note that once you enable the MEDIUM Ray Tracing quality preset, some of the game graphics options above are greyed out as well as the Ray Tracer takes over those functions.